
How to Create an Online Course: The SPI Essential Guide for 2024
Our 1,200+ members are actively building their online businesses—not just talking about it—which ensures that everyone has meaningful and relatable questions, ideas, tactics, and experiences to share. Together, no one is ever alone to figure it out all by themselves. Help, advice, support, and more is always within reach.
In late 2016, I sat down to set my goals for the following year. One of my biggest motivations was to significantly transform the way I generated income.
You see, for the previous eight or so years running Smart Passive Income (SPI), I’d generated the majority of my income from affiliate marketing. I still thought (and think!) affiliate marketing was a fantastic way to generate income, but I needed to add some nuance and diversity to the products and services I offered.
If you build your business entirely on recommending the products or services of others, you’re putting your business at risk. At any moment, the relationships you have with those product owners and services owners can go away. I’ve had that happen before. It wasn’t fun.
By creating my own products, I knew I could better serve my audience because I’d have full control over the product and could better craft it for my target audience. It would provide a better experience with the SPI brand as a whole. It would allow me to keep the SPI community within my ecosystem, and continue to foster that relationship by sharing new products I believed they could benefit from.
So how was I going to achieve all this?
By creating my own online courses.
Contents
- What is an online course?
- Why do people like online courses?
- Why online courses can be a win-win for you and your audience
- Four courses out of the gate: How did we do?
- The most common objections to online course creation
- How online courses work
- What it means to create a course
- Types of online courses
- How I’ve used online courses to generate income
- Are online courses for everyone?
- How to create an online course
- How to sell online courses
- More online course creation and marketing tips
- 26 course creators’ best tips for creating and selling online courses
- The top 11 mistakes to avoid when creating and marketing an online course
- Examples of successful online courses (and how they were started)
- My recommended online course creation platform (Where to host your online course)
Brainstorm your next online course.
Download your FREE Online Course Creation Template, a workbook to help you refine your ideas and create a concise course outline.
What is an online course?
So . . . what is an online course? Basically, it’s an environment for learning that someone can access through a digital device like a computer or smartphone. An online course is a great way to deliver a transformative learning experience to your customers while growing your audience, enhancing your authority, and making some passive income.
I’ve been all-in with online courses since 2017, and they’ve become a huge part of my business and the SPI brand.
I owe so much to the very first online course I took, way back in 2008, called Internet Business Mastery. It taught me, early on, that courses could help people, because it definitely helped me. This course really changed my life, and although it took me a little while after that to launch my own course, it’s hard to overstate just how big an impact online courses have had on my business and my audience.
And I’m not the only one who feels this way. Online courses have become an incredibly popular way for people to share their expertise with their audience while making some passive income. According to Stratistics MRC, the global e-learning market is expected to grow from $176.12 billion in 2017 to $398.15 billion by 2026! (Editor’s Note: This statistic was originally retrieved from https://www.strategymrc.com/report/e-learning-market-2018, which is no longer active.)
It’s a huge and growing market, which is why I’m excited to help you grab your piece of it with this guide.
Why do people like online courses?
If you’re like most course creators, you want to create your own course because of a desire to share your knowledge with others. In 2017, 63 percent of course creators listed “sharing knowledge” as their primary motivation for building a course, compared to 48 percent who named “making money” as their main driver.
But let’s be honest: a huge benefit of creating your own online course is having a scalable way to make income without putting in a ton of work after the upfront investment in time and energy to build the course. An online course can provide reliable passive income while better serving your audience, building community, and establishing your authority in your field.
And on the other side of the equation—the students taking those courses—there are three big factors that have made online courses so appealing to knowledge-hungry folks everywhere.
Online course student benefit #1: Accessibility
Forget packing up your stuff, traveling to school, and finding a classroom. Accessing an online course is as easy as firing up your computer and logging on to a website.
(Making sure your course is accessible to all learners, including those with disabilities, is another very important factor that we’ll cover later in this guide.)
Online course student benefit #2: Convenience
There are plenty of topics out there that a potential student can probably learn about by themselves if they spent enough time poring over Google search results.
So why build a course on something if the information is already out there?
The key is hiding in plain sight: if they spend enough time. People are drawn to the convenient option, even if they could get the same thing for free or more cheaply doing it themselves. Your course doesn’t need to offer some hidden collection of knowledge gems that can’t be found elsewhere. Simply offering a super-convenient way for people to get what they need to know on a given topic to achieve the desired transformation can be enough of a selling point.
Course student benefit #3: Affordability
Compared to other forms of learning, taking an online course often comes out ahead. There are no travel costs, and all of the learning materials are online so there’s no need to pay extra for physical textbooks and other resources.
Why online courses can be a win-win for you and your audience
The funny thing is, for years I knew I could create an online course, but to be honest with you, I was afraid.
I feared that I’d be doing it for the wrong reasons and that that’s how my audience would see it too. I didn’t want to just make something in order to make more money. That’s never the way to go, and that’s not who I am.
But then I heard from a number of smart people who told me I was actually letting my audience down by not creating online courses. One person, in particular, told me that they’d heard me talk about an online course I took once that had had a deep impact on me and my business.
I realized that by not creating online courses for my audience, I wasn’t paying it forward. I wasn’t giving my audience the same opportunity to discover that deep impact for themselves.
What kind of deep impact are we talking about, exactly?
Online courses provide a way for students to go deep on a topic in a way that’s convenient for them. A well-constructed online course provides everything students need to know, includes content of various media types to accommodate different learning styles, and allows each student to proceed at the pace that’s right for them. They let people get access to expertise that might be out of their reach financially—not everyone may be able to afford your coaching program, but a course might fit their budget and provide nearly the same benefit.
For you, the advantages can be huge too: A well-built course helps you build your authority as the expert on a topic, build community and develop new fans, and of course, make passive income. And when you create online courses, you gain the ability to have a wide impact as well as a deep one: You can serve a lot of people—theoretically an unlimited number—with each course you offer.
Four courses out of the gate: How did we do?
With all this in mind, I knew I wanted to make online courses a big part of the SPI brand. And so my plan for 2017 was ambitious: I was going to launch not just one (or two or three) but four new courses.
In October 2016, I beta launched my first online course, Smart From Scratch®, with over 200 students who gave me feedback to help me adjust the course for the public launch in March 2017.
From there, I created three more courses: Power-Up Podcasting®, Build Your Own Brand, and 1·2·3 Affiliate Marketing.
Our goal for the year was to generate about $400,000 in sales from these courses.
Did we meet it? I’ll tell you in a minute. But first, I want to talk more about the fear I had of creating my own course, because you may be dealing with the same kind of fear right now.
The most common objections to online course creation
I hesitated for so long to create courses because I was too afraid to sell to my audience. Here’s the big realization: You can sell online courses and serve your audience at the same time. I also realized that by creating courses for people who wanted to go deeper with me, I wasn’t taking anything away from the segment of my audience that prefers to take advantage of my free and lower-cost material.
That realization was huge. It pushed me past my fear of selling my online courses to other people, which was a huge relief, and allowed me to create better courses to better help and serve my audience. Now I see that I’m able to serve even more people, especially those who are willing to invest in themselves to achieve their goals. And for each course I create, my newfound confidence shows through in my sales pages, emails, and in the course material itself.
I hope that what I’ve shared so far has you excited about the possibility of creating your own online course—but what if the voice of doubt is still whispering in your ear? What if you still find yourself saying, “I don’t know if creating an online course is right for me”?
The truth is, creating online courses really isn’t for all people and all businesses. I think the most important thing is to first ask yourself, “What are the problems, pains, and needs of my audience?” And then ask, “Does it make sense for me to build and sell courses online in order to help them through those problems?”
If your gut answer is no, then building a course may not be the best choice for you, your business, or your audience. And that’s okay.
Beyond the key questions you must ask yourself, here are five of the most common objections or worries people have about creating their own online course:
- “I don’t know enough,” or, “I’m not qualified.” Is it that you don’t have enough to say/teach, or you’re just not sure how to get started creating a course for it? Knowing the difference can make all the difference.
- “There are other people teaching this topic.” Here’s the deal: If someone else is out there being successful teaching the thing you want to teach, that’s great! It means there’s a market for it. And it means there’s an opportunity for you to offer a better version or one tailored to a specific subset of that audience.
- “I don’t have a big enough audience.” Guess what? You don’t need a huge audience to have a successful course! And with some smart marketing (see #5 below), you’ll be able to get your course in front of more people who can benefit from it.
- “I’m not tech-savvy enough.” That’s okay! I’m going to show you how to overcome all the possible technical hurdles to building your course, in this guide.
- “I don’t know how to market it.” That’s okay! I’m going to show you exactly what you need to do to successfully market your course—you guessed it—in this guide.
With that out of the way, let’s return to the question I left hanging earlier: How did we do in the first year of selling those four courses to the SPI audience? Did we hit our $400,000 goal?
We sure did—in fact, we more than doubled it, with over $900,000 in course sales for 2017!
This blew my mind! But it also showed me that there was a need, and we’d been able to meet that need. In addition to the value created for the students of the courses, we also created quality assets and information that have generated income for SPI and my businesses in the years since.
Over the past few years, online courses have become a central part of SPI. They are the cornerstone of the SPI Community:
Premium courses that get the job done
Level 1
1•2•3 Affiliate Marketing
Learn to authentically generate more income for your business through affiliate marketing with our three-step system. Ideal for those who already have at least a small online presence.
Level 3
A to Z Webinars
A step-by-step roadmap to help you create and deliver webinars that work. Grow your list. Increase trust. Make more money. Ideal for business owners looking for growth.
Level 3
Community Business Blueprint
Draft your ultimate community success strategy to best suit your business goals. Co-created with the team at Circle.
Level 2
Email Marketing Magic
Grow your list, make more money, and automate like magic with this course on establishing an email marketing program. Ideal for anyone new to or frustrated with email marketing.
Level 2
Heroic Online Courses
Become a course creator the SPI way! Learn to create powerful courses where you transform your audience into heroes. The course covers everything you need to know, including refining your course niche, creating a production plan, and crafting a powerful sales page.
Level 2
Power-Up Podcasting®
Create, launch, and market a podcast that grows your income and impact online. From step-by-step setup to how to get found (even on launch day). Thousands of students have enjoyed this course. Now it’s your turn!
Level 1
Short-Form Formula
Short-Form Formula teaches you to master short-form video, as a tool for building your audience, strengthening connections, and fueling long-term growth. Taught by Pat Flynn, whose daily short-form series attracts over 10 million views every day.
Level 2
Simple Site Success
Simple Site Success teaches you the essential principles for building a website that actually works for your business, without getting lost in overwhelming technical details.

Foundation
Smart From Scratch®
Learn how to find a winning business idea and land your first customer. Ideal for those who do not have a business yet, or who are exploring starting a new business.

Level 2
Smart Offer Design
Your step-by-step roadmap to finally turning your ideas into a real, authentic offer you can confidently bring to market. You’ll learn how to validate what to sell, define your ideal audience, and design an offer you’re genuinely excited to deliver.

Level 1
Sponsor Me
Learn how to land your first brand deal — even when you have a small audience. You’ll learn how brand deals actually work, how to find and pitch the right brands with confidence, how to negotiate and get paid what you’re worth, how to create sponsored content your audience will actually trust, and how to turn one deal into lasting income.
Details page coming soon
Level 2
YouTube From Scratch
Learn how to start a YouTube channel and get your first 1000 subscribers so that you can qualify for YouTube’s monetization program. This is a course for beginners who do not yet have a YouTube channel.
Since creating my first course, the SPI courses have together generated nearly $3 million in passive income! Just as importantly, they’ve helped me better serve my audience, foster a vibrant community around each course, and diversify my income sources. These courses aren’t just another piece of the income puzzle—they’ve become an integral part of the brand and how SPI serves its audience.
How online courses work
An online course is a structured environment for learning that someone can access digitally. You create a “path” your student can follow to learn about a given topic and achieve the desired transformation, sharing your expertise via various forms of media like text, video, and audio. Many courses also provide the opportunity to connect with a community of others taking the course, mechanisms like downloadable worksheets (homework!) to ensure accountability, and the chance to learn directly from the course builder through regular “office hours.”
On the course creator’s side (that’s you!), you get benefits like increased authority, audience growth, and passive income. But how do you create an online course that makes you money? Basically, you charge a set price for each person to take the course, which entitles them to access the course materials, typically for as long as they like.
It’s important to remember that, just like any worthwhile method of passive income generation, building an online course is not a get-rich-quick scheme. Like all ethically sound passive income opportunities, it requires work upfront. But once you’ve created your course, it becomes an asset that can continue to generate income for your business well into the future.
In terms of how you sell courses online, there’s a lot that goes into marketing it, and we’ll talk about that later on in this guide. There’s also the aspect of timing: courses can be made available year-round (“evergreen”) or only at certain times. There are benefits and tradeoffs to each approach, but making your course evergreen is generally preferable if you want to make it available to as many people as possible. The alternative option, making it available only during certain windows of time, can convey a sense of scarcity and help build excitement about the course.
What it means to create a course
Let’s talk about the different ingredients that combine to make a delicious, satisfying, and transformative meal for your course students.
There’s one ingredient to creating a successful online course that comes before everything else (and I hinted at it above): Your desire and ability to help your audience create a transformation for themselves.
The transformation is the why or the outcome that your course will provide. It is the most important thing you need to clarify before you start creating your course!
Remember: the transformation is not just what’s inside the course! Here are a few examples to show you what I mean:
- Not a Transformation: How to Set Up Your Podcast and Launch on Apple Podcasts
- Transformation: How to Launch a Podcast that Impacts your Income and Influence Online
- Not a Transformation: How to Start Email Marketing
- Transformation: How to Get Email Leads to Grow Your Business and Connect with Your Audience
If you can define the transformation clearly before you start creating and marketing your course, then you’ll have a much better shot at building something that people will flock to and benefit from. With a clear transformation, it becomes so much easier to market your course and communicate its value, and it becomes easier for potential students to understand if it’s for them.
The next ingredient is expertise.
Let’s say you offer premium services—like one-on-one or small-group coaching—that are good income generators but are inherently difficult to scale. A course is a great way to provide a deep level of expertise and learning without offering your time as well (beyond the time you spend upfront creating the course).
But wait, I hear you thinking, I have to be an EXPERT? Having expertise just means having more experience than someone who doesn’t know where to start, or hasn’t had as much time with something as you have. You don’t have to have a Ph.D. or go to school for years to be able to teach something. Credentials help, but sometimes the better teachers, as we all know, are the ones who have a closer connection to the audience and the most recent experience with their topic area.
Your expertise comes through via the next ingredient, the content you use to share the information in your course. Your expertise and your content come together to help create a transformation for the student.
Do you already have a blog? Do you write emails to your list, create instructional videos, or publish your own podcast episodes? Then guess what? You already have what it takes to create content for an online course!
There are a few main forms of content to consider using to teach the material in your course:
- Video
- Audio
- Written material
- Downloads
These are not the only content types you can use, but they’re the most common ones.
As far as software to help you organize your course content and manage and distribute your course, we’ll cover that later in this lesson. In case you’re curious, however, this platform is called Teachable, and it’s awesome!
I recommend using a variety of content types in your course. Why? Because different people have different learning styles. Some people learn better by reading, while others have an easier time digesting and processing information when they hear it, or when they see it.
A big question many would-be course builders ask is, how much content do I need to create a successful course that helps people achieve that promised transformation?
The short answer is less than you might think. A great online course is one that simplifies things and cuts through the fluff to deliver only the most essential nuggets of information your student needs to get to that transformation.
Other ingredients of a successful course
The next few ingredients can help your students have an even more positive and successful experience with your course.
The first of those ingredients is community. Having access to a supportive community of like-minded people can make the difference between a good learning experience and an amazing one.
The next one is accountability. Helping your students have an effective learning experience isn’t just about giving them information, but about helping them stay on track and do the work they need to do to actually learn.
The third ingredient is access to you, the expert. Although most of your course content is going to be pre-made—you record the videos, write the text, etc., beforehand—you can also offer the opportunity to work directly with you. One way to do this is with “office hours,” set periods of time where students can join you live to discuss the material they’re learning, ask questions, and get customized help.
These additional ingredients can make an already solid course even better and turn a happy student into a raving superfan who will stay with you for life.
Types of online courses
Another great thing about online courses is that they can be super basic, really thorough and complex, or somewhere in between. Here are examples of five different course types, in ascending order of complexity, to give you an idea of what’s possible.
Free email course
A simple, free course delivered via a series of emails. Could be good for lead generation, attracting potential customers for a bigger course. Our most popular example of this is our 100 Email Challenge, which helps new online entrepreneurs get the first 100 subscribers to their email list.

Go from 0 to 100 email subscribers in three days!
You’ll get one email each day for three days, giving you step-by-step instructions to help you finally build your list—even if you don’t have a blog or business yet!
Sign up for the FREE 72-Hour Email List Building Challenge
Join 10,000+ other challenge participants!
Free video course
A video course that lives on your website. Requires more production, but gets people to your website. Our epic guide, How to Start a Podcast Step-by-Step is one of the biggest drivers of traffic to our site. The guide includes video walkthroughs.
Paid short course
A handful of modules that go into more depth than your video course. A low-cost way for people to go a little deeper on your topic. We developed our mini-courses for this purpose, including Podcast Advertising That Works and Pricing For Profit, both of which are included in the SPI Community.
Paid medium-length course
A larger collection of modules that explore additional elements of your topic. More income, more learning.
Paid high-end course
A comprehensive course with multiple forms of content, including access to a Facebook group and office hours or coaching calls. This is what our courses such as Power-Up Podcasting and 1•2•3 Affiliate Marketing were developed to do.
As you can see, it’s possible to start small and create a “ladder” with your courses that helps people learn from you at the level that makes sense for them.
However, I definitely don’t want you to think you need to create five courses, especially if you’re just getting started. The best approach is this: start with one course, and make it great. Your first course doesn’t have to be an entry-level product, either. You can create something premium that people will pay good money for, as long as it’s something that actually provides the transformation they’re looking for.
The most important thing is to develop courses that your audience wants, and we’ll talk about exactly how to do that later in this guide.
How I’ve used online courses to generate income
I want to share a story about how my very first course came about, and how it carved a path for online courses to become a major and indispensable part of the SPI brand.
That course was a free companion course for my second book, Will It Fly?.
I created a course containing a module for each chapter of the book, with all the links mentioned in that chapter, plus bonus materials like videos that gave readers a way to dive deeper into the content.
My main goal with the companion course, beyond giving people who’d read the book even more value, was to collect email addresses.
The strategy paid off! Nearly 40 percent of people who purchased the book ended up taking the free companion course and sharing their email address with me.
There was a secondary outcome to the Will It Fly? companion course that was less expected but pretty remarkable. After going through the companion course, many of my students told me they wanted more. More detail, more accountability, and more community.
So I decided to beta test another course that would go into more detail about the process I covered in Will It Fly?, as well as give students access to me and a community of other students taking the course.
To validate this new course idea, I set a goal of getting 100 students from the Will It Fly? companion course to sign up for the paid beta. If I didn’t hit that number, then what? Simple! I’d just cancel the course and refund everyone’s money.
Doing things this way had two benefits: first, it would provide some income upfront, but much more importantly, it would validate whether the idea was worth pursuing.
I called that new course Smart From Scratch®, and it promised to help people find a winning business idea and land their first customer. I pre-sold Smart From Scratch for $197—and sold out all 100 spots in one day. A big reason for this was that I knew exactly who I was speaking to, and I knew exactly the language I needed to use to show them that I could help them take the next step.
Starting with a beta version of Smart From Scratch® was amazing because it allowed me to gather feedback from those first 100 students and adjust the course based on their input. As a result, I was confident that when I finally launched the course to the wider public, my new students would see real results.
Smart From Scratch® has since earned me several hundred thousand dollars, and it’s still available to new students in my course library. Many of those students have enrolled in my other courses too.
Are online courses for everyone?
Online course platform Teachable [affiliate link] has crunched the data of more than 10,000 course creators, and they’ve identified three buckets that course creators typically find themselves in when they’re getting started creating a course:
- “I’m excited but have no idea what I want my course to be and don’t know where to start.”
- “I have an idea of what I may want my course to be about, now I need help to refine my idea.”
- “I have a lot of ideas for courses and just need to figure out which one is the most profitable.”
Later in this guide, we’ll break down what you need to do to succeed with your online course based on which bucket you fit in.
But what happens when the idea of creating an online course just doesn’t seem like a good fit for you? In the introduction, we touched on some of the most common objections and reasons you might not want to create an online course.
Don’t develop courses just because you think you should. If you a) have absolutely no interest in creating a course or b) really don’t think your audience would be interested, then creating a course probably isn’t for you.
What if you’re on the fence? If you’re not sure if your audience would be interested in a course, then ask them! And of course, if your audience is asking you to create a course, that’s a pretty clear signal you need to look into offering one.
Unfortunately, too many people find themselves paralyzed by the question, Who am I to create a course of my own?
Even though I’ve been in business for over a decade, it’s only in the past three years that I’ve been creating and producing online courses of my own. People asked me for a long time to create my own courses. I would tell them to take someone else’s course. Share the love, right?
But it wasn’t until a friend and mentor told me I was doing my audience a disservice by not offering them a course!
A disservice. That realization set in motion a huge mental shift for me. If you have an audience that wants to learn more from you, then you owe it to them to provide a way to do that—with you.
If you have an audience, that means there’s a group of people out there who are interested in learning from you. You may not be the only person in your space, but there’s a reason those people are listening to you over someone else. They may be drawn to you because they like your personality, your teaching style, or some other combination of factors.
They like you, and they want to learn from you.
Starting from scratch—does making an online course make sense?
But what about the beginners out there? What if you’re just getting started in online business and don’t have much of an audience (if any) you can ask for input? Does a course make sense for you?
You’ll need to do a little more work upfront to figure out a focus and build a following—but having your own course that’s driving passive income for you is definitely not out of reach.
If you’re starting from ground zero, you can ask yourself these basic questions:
- What are you good at or passionate about?
- What are you already interested in?
- What experience do you have? What jobs have you done? What skills do you have? What hobbies do you enjoy?
There’s one more myth that I see floating around, and it’s that your course has to be about building a business of some kind or creating an income stream. But here’s the thing: You don’t have to teach people how to make money. There are so many other options out there.
People have many interests, hobbies, and passions, and if your skills and experience are a match for theirs—but you just happen to be further along—then there’s an opportunity to create a course that people will pay you for. There are thousands of reasons people might pay money to take a course. Are you good at acrylic painting? How about rug weaving? Door hinge repair? Underwater meditation? Then a course might be in your future, so get ready to do some learning.
How to create an online course
- Find an audience where your target market exists
- Do your online course research
- Define the transformation (and your course title!)
- Brainstorm your course content
- Organize your thoughts
- Make your course outline
- Pre-sell your online course
- Communicate with your future course participants
- Build your (beta) online course
- Share your course and collect feedback
- Refine your online course
- Launch and sell your course!
Okay, you’re finally ready to start building your first online course! There’s a lot of work ahead, but it’s not just busy work. This is the fun, exciting business of finding what your audience needs and crafting a course that will help them achieve a powerful transformation. You’re going to have the chance to talk to people, do research on what’s out there already in your niche, nail down your course topic, and dive into content creation. Then you’re going to share that course with a small group of initial students who will give you great feedback and inspire you onward.
I’m so excited for you because creating a course from scratch is one of the most rewarding things you can do as an online entrepreneur. There’s a lot to cover in this how-to make an online course section, and I’m going to break it all down for you now. This is where the rubber meets the road, so to speak, so let’s get to it!
The first thing you need to do is figure out your course topic. As we touched on previously, this process could look a little different depending on how far along you are in your business journey.
If you’re starting from scratch with little or no audience, you’ll need to do a little more work upfront before creating your course.
The first step for you is to ask yourself these questions:
- What are you good at or passionate about?
- What are you already interested in?
- What experience do you have? What jobs have you done? What skills do you have? What hobbies do you enjoy?
If you really are starting from scratch, then you might find it helpful to get more guidance in turning your answers to the above questions into a viable business idea. To help you with that process, I highly recommend you check out my Smart From Scratch course. Smart From Scratch is a hands-on, comprehensive course that enables you to develop a business idea, validate it, and determine if that idea is viable to pursue. You’ll learn how to test whether or not there’s an audience for your business idea.
If you already have an audience, and you’re interested in building a course for them, the first thing to do is start having conversations with your audience, to understand exactly what they’re going through and where they could use your help.
Conversations are the fundamental strategy to figure out what your target audience wants to know more about and need help with. It’s so important to me to have conversations with my audience that I make the effort to have ten calls with brand-new email subscribers every single month to discover what I can help with and what most people are interested in.
When you reach out and talk to people like this, it takes away the guesswork, and you can have a lot more empathy with your audience when building your course, which is hugely important.
The SPI method to researching, validating and building your course
I’m about to share with you my comprehensive process for developing your first online course, and it involves a few overall steps:
- Doing audience research
- Developing your course idea
- Validating that idea
- Building the course
- Refining the course based on customer feedback
Before we get into these steps in more detail, I first want to highlight the third step, because it’s maybe the most crucial element of this whole course-building exercise: validation.
When it comes to creating a course that people will buy and benefit from, validation is everything. If you don’t adequately validate your course idea, your course may not be as successful as it could be—or it may even completely fall flat because you didn’t build something that solves a real problem people are having. If your course idea is going to fail, you want to know that upfront, not after you spend a ton of time (and/or money) creating it. Then, you can learn and pivot in a better direction with the next attempt.
The thing to understand is that validation is not based on someone telling you they would buy, like, read, consume, watch, or listen to something you create. Validation is based on actions they take that confirm their interest in what you’re creating or selling.
All right, let’s do this!
Step 1: Find an audience where your target market exists
Before you can come up with your course topic, you need to get access to an audience of people in your market that you can learn from. Without that audience, you can’t properly validate your potential topic, and this is where a lot of people stumble.
If you’ve built an audience and have a following already, then great! You already have what you need to move on to the next step, no matter how big or small the size of your platform. Once you’ve “found your people,” you need to learn more about who they are and their wants/needs, because this is where you’ll learn what to make your course about.
If you don’t have an audience yet, it’s going to be a little bit harder, but not all is lost. That audience you need doesn’t have to be one that you own or build yourself. You just need to get access to an audience, and there are several different ways to do that.
- Guest posting: Write articles for blogs with authority among your intended audience.
- Forums: Strike up relationships and offer yourself as a resource by joining and creating conversations.
- Groups: Similar to forums, join conversations and build relationships among your target audience.
- The “Poster Child” formula: Coined by Bryan Harris of Videofruit.com, become a model student who can be featured as a success story on influencers’ websites.
- The Derek Halpern strategy: Reach out to influencers and provide a valuable tip or resource while asking for nothing in return, so you can get in front of their audiences.
- Targeted advertising: Serve ads to your potential target market on platforms like Google AdWords, Facebook, or Twitter.
- Private targeted advertising: Create banner ads on websites with some authority in the industry or space you want to focus on.
- Offline audiences: Land a speaking gig in front of a live audience.
- Crowdfunding platforms: Get in front of an audience and validate your idea at the same time.
For more detail on how to use each of these techniques and platforms to get in front of an audience, check out my book Will It Fly?.
Step 2: Do your online course research
Once you’ve located your audience, you need to start digging into some research to understand their wants/needs. Here are a couple of ways to do that. Once again, you’ll find an in-depth discussion of these tactics in Will It Fly?.
Find conversations that are already happening online.
Groups on social media channels like Facebook or LinkedIn are amazing tools for conducting research and finding conversations. In the search bar at the top, type in some keywords that you believe your target audience may be using to find each other. In the search bar within the group, usually located in the sidebar, type in the following phrases to help you find the goods. Make sure to include quotation marks to get exact matches:
- “Why is it”
- “When can I”
- “What are the”
- “What is the”
- “How come I”
- “Need help”
- “Please help”
- “I need”
- “Help with”
You can also use this method in forums, blogs and even on Google!
In AskPat episode 825, I give Sarah the condensed version of my process for determining whether a course idea is worth pursuing or not.
Ask people about their biggest challenge.
This method is something I learned from Ryan Levesque, who wrote the book Ask. Simply ask people about their biggest challenge related to a specific topic, then follow up with them to learn more. If your business involves helping people succeed with their podcasts, maybe it’s asking about the biggest challenges they encounter when finding interview guests for their show. Then, reach out via email or direct message to the people who respond to ask follow-up questions. I think you’ll find people are more than happy to share a lot of valuable details that will help you create and refine products and services to address their pain points.
In this podcast episode, Ryan himself walks us through his in-depth, super-actionable strategies for asking your audience what they want to buy—using me as his test subject.
This method works well if you have an email list. But what if you don’t have an email list, or a big one yet? My 72-hour list-building challenge will help you find your first 100 email subscribers. But before you even do that, you can simply make your question one of the first things people see when they come across your brand, even if they haven’t yet subscribed to your email list or followed you on social media. Post your question on social media where even a casual visitor will see it and have a chance to respond.
Find ten people, and ask them to spend fifteen minutes talking to you about a problem or need they have related to your area of expertise or interest.
Once this phase of your research is complete, you’re hopefully seeing the needs and gaps you can fill in for your audience and can start brainstorming potential topics for your course.
Check out the competition
Now it’s time to research your competition. The first step is to see how many other courses there are on the topic—and a simple Google search will help you here.
Once you have a list of courses, it’s time to learn more about them. Dig into the marketing materials for each course; course builders will often post a list of modules and lessons on their sales page, and some even make part of the course free to try out. In addition, course students will often post reviews of the courses they’ve taken on their websites, so take your list of courses and do another Google search (“[course name] review”). Even if you don’t find reviews for every course on your list, you should get a better sense of what people like and don’t like about each one and build an understanding of how you could develop courses that address the needs those other courses don’t.
What do you do if there’s no competition for the niche you want to create a course in?
It’s important to remember that you’re not researching other courses to copy but to learn how to improve on what’s already out there.
So what exactly are you looking for with this competitive research?
- The benefits and features of each competitor’s course
- What promises those course creators are making
- How much the course costs
- Where might there be gaps you can fill with your own course
Another great way to do competitive research is to spend time in your competitors’ Facebook groups. Here’s what you need to know before you do that, though:
Now that you’ve done your research, you’re ready to get started creating your course! Here are the rest of the steps you need to follow to develop an online course from scratch that people will love.
Step 3: Define the transformation (and your course title!)
The key here is to know and define the transformation that your customers are going to experience when they take your course: the promise of your course. What will your course help them achieve? Once you know that, you’ll have your selling point. You can draw a clear picture in the mind of the customer of, “Wow, if I get this, then I get that.”
For example, here’s the transformation I promise people when they take my 1·2·3 Affiliate Marketing course, an interactive video-based training program that teaches people step-by-step how to authentically generate more income with affiliate marketing. I promise they will earn their first dollars through affiliate marketing, which is generating an income and a commission by selling and recommending other people’s products rather than products of your own. The people who take the course will see a direct impact in their earnings and income as a result of promoting specific products in specific ways. They will also learn how to go about affiliate marketing in an ethical way. If they do the work and follow the directions, they’re going to earn their first dollars through affiliate marketing. If this doesn’t happen, the course will have failed.
Or with my Power-Up Podcasting® course, I promise people will learn step-by-step how to launch a successful podcast that gets found and grows their online brand. They won’t just be learning how to create a podcast, but one that people will actually listen to and that will help them grow their business.
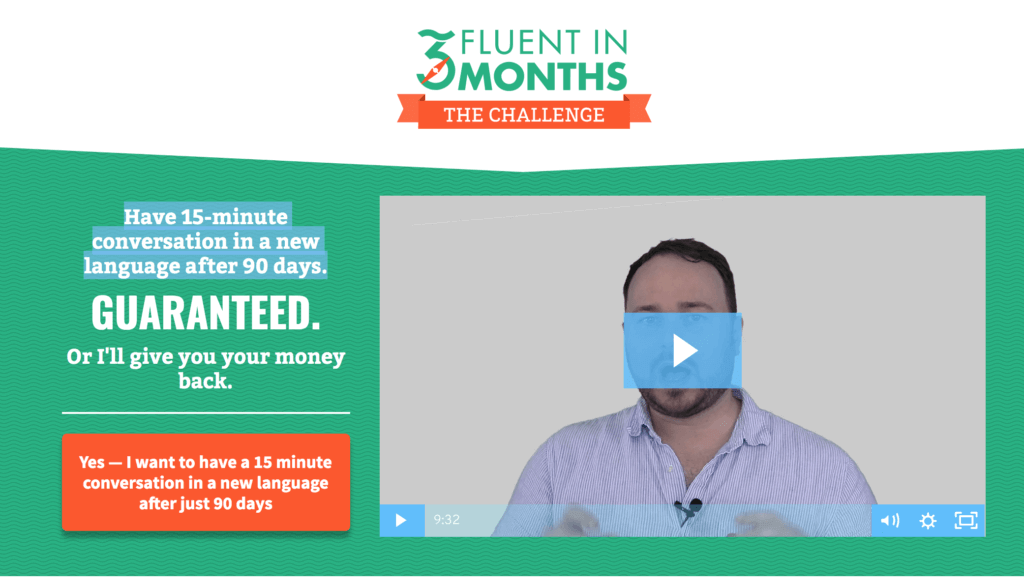
My friend Benny Lewis promises to help people learn how to have a 15-minute conversation in another language in just ninety days with his Fluent in 3 Months course. He even guarantees a refund if the promise isn’t met in that time frame. If you’re looking for a picture of what you’re going to get from a course, it doesn’t get much clearer than Benny’s course.
Whatever the course, it doesn’t matter how great the information is; if it doesn’t provide that transformation, then what’s the point and why would people buy it? If you’re having a hard time defining the transformation for yourself, well then, there’s a problem, because guess what? Your customers are having a hard time understanding it too. I think of Ramit Sethi’s courses, such as Earn Your First Thousand Dollars, or Find Your Dream Job. Those are very clear promises about what will happen if you follow the course correctly—and they’re baked right into the name.
Speaking of names, let’s talk about how to pick a great course title!
Come up with a course title
It goes without saying that your course needs a great title. You can have the greatest content in the world, but if your title doesn’t grab your potential student and tell them exactly what to expect if they take your course, they’re much less likely to purchase.
A great title and subtitle should:
- Describe the course accurately
- Grab someone and create an emotional impact
- Communicate the transformation the course will provide
To give you a good idea of how to construct your own effective course title and subtitle, let’s take a look at a few great course titles/subtitles and break down exactly why they work so well.
- Smart From Scratch®: How to Find a Winning Business Idea & Land Your First Customer. The alliteration grabs your attention, and the “land your first customer” element helps conjure an immediate image of success for the prospective student.
- Fluent in 3 Months: Speaking a Second Language—The Essential Guide. This is one of Benny Lewis’s courses. The transformation (and even its timeline!) is clear in the title, and the “Essential Guide” language in the subtitle conveys authority.
- Power-Up Podcasting® 2.0: Everything You Need to Know to Launch and Market a Podcast That Matters. Can you tell I like alliteration in my course names? The “podcast that matters” element helps identify the target audience of podcasters who are in it for the long haul and want to create something meaningful.
- The Copy Cure: Find Your Voice. Sell Your Anything. More alliteration! This is Marie Forleo and Laura Belgray’s excellent copywriting course, with a clearly defined transformation (“Find your voice. Sell your anything”).
Don’t rely on your course description to describe the course to a potential student. You’ll be surprised how many people only look at the title and subtitle before deciding whether to learn more or move on. Think of the title/subtitle as your course’s elevator pitch; you need to grab the student’s attention and convey the value of your course in a small amount of space.
Also, don’t overthink or stress about your title too much in the early phase of course building. When you’re still testing your course, it’s okay for your title to be a work in progress. As you get feedback from your beta testers, you can update the title to better match the benefits and outcomes people are getting from the course. You can even ask your testers for direct feedback on the title.
In AskPat 1088, Lesya and I drill down on exactly what she needs to do to start building a course her audience will want.
Step 4: Brainstorm your course content
We started at a higher level, identifying our audience’s pains and problems and figuring out the transformation we want to help them achieve. Now we have to figure out the steps they need to take to get to that transformation. Once you’ve defined the transformation your course will provide, you can start to define the pieces that lead to that transformation. What stories do you need to tell? What facts and case studies do you need to share? What exercises does the student need to do to get on the path toward that transformation?
To do that—to reverse-engineer that transformation and figure out exactly what needs to happen for them to achieve that transformation—we first have to do some brainstorming.
You may have some ideas in your head about what should go into your course, but unless you do this brainstorming stage the right way, you’re either going to miss a lot of things, or you’re going to go out of order. The way I would recommend doing this is with my favorite tool in the world: Post-it Notes. Post-it Notes are my favorite tool for brainstorming, because they’re great for getting what’s in your brain out onto paper, and they’re small (so you can only include one idea per note).
Our brains do a great job of coming up with new ideas, but a terrible job at organizing and prioritizing them. Writing down those ideas on Post-it Notes lets you bring them out into the world, where you can see them and start to organize them. Just remember, in this step, you’re basically “throwing up” the contents of your brain onto these notes—you’re not organizing yet!
Cool things happen when you are in that kind of creative mindset—you can just let your creative brain get into the flow. I like to structure my brainstorming according to what I call the “triple 10” exercise. In this exercise, you:
- Spend ten minutes brainstorming as much as you can
- Rest for ten minutes
- Then come back to where you were, and brainstorm for another ten minutes.
I’ve found that the final ten minutes in that total thirty minutes is often when the best ideas come out. Why’s this? What happens during that break? Yes, you are resting, but your brain is also absorbing and processing everything it’s just done. When you come back from that break, your brain has just processed it in a way that you couldn’t have if you hadn’t taken the break.
So step 4 is to brainstorm, using Post-it Notes, by letting anything in your brain come out then posting those ideas onto your table or wall. Just let it happen.
Step 5: Organize your thoughts
Now, you need to take all those Post-it Notes and put them into some kind of order. The key in this next step is to organize the notes into different clusters or hierarchies related to your core topic.
Eventually, you might find that these clusters essentially become modules in your course, and each of these Post-it Notes will become your lessons. That’s the magic of this process. This process also makes it easy to find the right order of all the pieces. You can ask, “Would it make sense to put this before that, in the eyes of my customer?” That’s the beauty of Post-it Notes again: You can simply move them around on the desk or whiteboard to reorder things.
As you go through this process, you’re going to have a few Post-it Notes that will make you say, “Why did I even write that?” Just throw them out. You’re also going to find where there might be some holes, some things missing. In that case, just create more Post-it Notes to cover those missing topics and add them to the appropriate clusters.
Step 6: Make your course outline
Now you’ve gone through the brainstorming and organization phases, you can create an outline for your course. The work is mostly done; you just need to review the re-ordered Post-it Notes and “extract” the details of how you’ve organized them to create your outline.
As we talked about in the previous step, your outline should be structured in terms of modules and lessons.
The next key here is what you do with that outline. And what’s that? You’re going to share it with others to get their feedback.
Perhaps you have superfans, people in your audience who would benefit and feel great that you’re trusting them with this, and could provide some amazing feedback. Maybe it’s people in your mastermind group, or other colleagues or friends who might be looking for the kind of transformation you’re offering with your course. Whoever it is, share your outline with them and say something like, “Hey guys, here’s the tentative outline for this course that’s going to help you [transformation]. Look it over, and let me know what you think. Does it make sense? What else would you include? What would you remove?”
You’re going to get feedback—some of it easy to hear, and some of it not so easy. Your reviewers may suggest new material that they feel is missing from your outline. But they might also suggest cutting things you really like. That’s a hard thing to do. This is what in the book writing space is called “killing your darlings.” And you have to be willing to do the same thing with your courses. You’re going to have to kill the lessons that aren’t necessary in order for that transformation to happen.
So it’s super important to ask your reviewers, “What lessons in here are not necessary to achieve this goal?” That allows you to make sure you only have what you need in your course. Doing the sometimes painful work of identifying and cutting unnecessary material helps in several ways. It’ll save you valuable production time, and it’ll help the course participants by reducing the amount of unnecessary fluff they have to wade through in the course.
Step 7: Pre-sell your online course
You have an outline, and you’ve collected feedback to validate the concept and the outline. Now, you’re going to pre-sell this bad boy to a limited number of targeted people in your audience.
So who exactly are you pre-selling to? To find your ideal customers, you need to hyper-target within your audience.
A. Hyper-target (aka the Hand Raise).
The next phase in the validation process is to hyper-target. This means getting people in that larger target market to self-identify as someone who wants or needs your particular solution.
I like to metaphorically describe this phase as getting a targeted portion of that audience to “raise their hand.” Why a hand raise? Because raising one’s hand is simple. It takes almost no energy to perform, but there is so much meaning behind it. A hand raise signals “me!” or “yes!”
The truth is that it’s very unlikely that 100 percent of any general target market will be completely interested in your solution, so it’s important to validate only with those for whom your solution would be suited.
Using this methodology, you can begin to identify the portion of an overall target market with which you can take the next steps.
Course first, or list first? Here’s some advice on how to handle this chicken-or-egg question.
B. Interact and share your solution.
All selling starts with the relationship, so you have to begin by getting the person on the other end to know, like, and trust you.
After you’ve discovered who your prospects are, it’s time to interact with those people directly. You’re not quite presenting your solution yet, but you’re really close. The idea here is to start to engage with the people who have signaled interest At this stage, ways to engage might be,
- An in-person meeting
- A video call, like a Google Hangout or Skype conversation
- A phone call
- A private message (i.e. on a forum or social media channel)
- A direct one-on-one email.
There are three main steps here:
- Take a minute to learn about them first (while also confirming they are in the right place).
- Qualify yourself. This means sharing a little bit about who you are, but also why they should continue to listen to you.
- Be honest. It’s always best to reveal things yourself first than have someone else find out later, so I’d be upfront about the fact that you’re hoping to get their honest feedback on something you believe will help them that isn’t built or available yet, but that you will create and sell it if there is enough interest.
After you re-qualify the person through this quick conversation, it’s time to reveal your solution—to give your pitch.
At this point, you’re not yet asking for any kind of payment, but you are selling your idea to them to determine whether or not this is a solution that might solve their pain or problem.
If possible and relevant, you could also share a prototype of your solution with your audience. This is obviously difficult to do if you’re on a phone call so it’s not always possible, but I like the idea of having some initial version of your solution available to see because it makes this all the more real.
In the next and final step of the validation process, we’ll be asking people to say “yes,” not with their words, but with their financial commitment. Yes, you’ll be asking your prospects to pay money ahead of when the product is actually built.
C. Ask for the transaction.
Asking for a payment before you build your product might feel uncomfortable to you, but if you’re honest about this with your prospect, you’ll have nothing to worry about. Furthermore, paying for something ahead of time is something people are a lot more comfortable doing with platforms like Kickstarter and Indiegogo on the rise. At this point, you’ve got your prospect’s attention. You’ve provided value, and you’ve shared what your plan is. The next step is to get those who are interested to validate with a transaction.
Then you can go on to pre-sell it, explaining, “I haven’t made this yet, but I’m going to give access to twenty people who are willing to work with me as I build this course, so I can make sure it meets your needs exactly. I’m also going to give you some extra time with me to help you through this content. If we get twenty people, I’m going to create it. If not, don’t worry. I’ll refund your money.”
Pre-selling in this way lets you validate what you’re trying to do with your course. If people are willing to buy at this early stage, this information helps solidify that you are going in the right direction. It allows your audience and your potential customers to vote with their dollars that it’s something they want, and something you need to do.
What do you need to do to pre-sell? A number of people I’ve interviewed on the podcast have simply pre-sold their courses by saying, “Hey, if this is something you want, shoot this much money over to my PayPal, and I’ll put you in a Facebook group to communicate next steps.” That’s one way to do it. You don’t even need a landing page or anything like that.
Step 8: Communicate with your future course participants
Step 8 builds on what we just talked about in the pre-selling step. The last thing you want to do when you sell anything is to have a person buy it and then not know what happens next. No matter what, always make sure you have a great onboarding process. You want to make sure your customers know you didn’t just take their money and leave.
So, once you pre-sell the course, you have to make sure that you keep your customers up-to-date. Communication is crucial. For instance, if you’ve promised entry to a Facebook group to communicate with people as you are building the course, then set that up.
With my 1·2·3 Affiliate Marketing course, because I have a team and a lot of resources in place, we created a landing page with a video that explains the promised transformation, what people are going to get, the fact that it was a beta launch, that it was going to be pre-sold, and that there was nothing to get access to yet. We had a button that connected to a shopping cart through Teachable, where the course was hosted. Once they got access to the course, they saw one lesson in there, a welcome video thanking them for being in the course and telling them what would happen next.
Follow through, stay in touch, and most importantly, be honest.
Step 9: Build your (beta) online course
Finally, we’re on to product creation! You’ve validated the course through pre-selling. Hopefully, you still have your Post-it Notes, because they’re going to be your guides for the next step here. This stage—production—is a difficult one, because it takes the most work.
For this stage, you’ll use the outline you created earlier (maybe using Post-it Notes).
Figure out your content mix
You’ll first need to decide the balance between content types: video, audio, and text.
I’m going to share my recommendation for how to prioritize these content types, but let me start by saying that I believe that you should always aim high when you’re creating a course. You should be going for a premium quality, and strive to create the highest-quality course possible. Your customers will have a better experience, your brand will benefit, and you’ll be able to assign a higher price point.
Here’s how I suggest prioritizing content types:
- Video
- Text
- Audio
When you’re thinking about the different media that go into your course, video should be at the top of your list. In my mind, video is the ideal medium for online teaching, and it’s crucial to have if you want your course to be perceived as premium. You can see and hear the instructor at the same time, so it’s the closest thing to having them in the room (or at least on a live camera call) with you. Video also lets you easily convey the visual aspects of what you’re teaching, makes it easy to follow onscreen directions, and helps your students see with their own eyes how they can reach the transformation you’re promising them. For those reasons, video is a big notch above other media you might use, such as text, audio, or images.
Text should be used to support the video, as well as provide transcripts for those who want to download the content and review it that way.
I recommend using audio as an add-on or a convenience. Audio is also a potential alternative to video if your budget is tight, but I still recommend including video in your course (even if it’s just using your iPhone) if at all possible for the reasons I listed above.
With that out of the way, let’s start building your course! You’re going to start by creating the lighter beta version you’ll be sharing with your early adopters, so let’s discuss exactly what goes into that process.
Build the beta
You need to first consider what needs to go into the creation of the beta version of your course—the one you share with the early adopters, the ones you pre-sold the course to. Thankfully, you can get away with a “first draft” version of your course for the beta, which you can then enhance later on to create the final version that most people will get.
(I don’t want you to think that you have to use the word “beta” for the first iteration of your course. Keep in mind that in some industries, like software, “beta” can be interpreted as “lousy first version,” so if you’re worried about that, or you don’t think your audience will know what it means, then pick another term, like “pre-launch” or “pre-release.” And you could call your beta students “early adopters,” “first-timers,” “champion users,” “charter members,” or something along those lines. You can even make up your own terms for your beta course and its early users!)
There are a few ways you can get away with going “lighter” in the beta, particularly when it comes to video. If you’re going to create videos, you don’t need the highest production values in the beta. When I create final versions of videos for my courses, I do them in my video studio with a high-end camera. But for the beta versions, I typically record in my home office, just using a basic DSLR camera. You can even use a video camera from your phone, as long as the audio quality is good. You could also use a portable recorder such as a Zoom H4n or a Zoom H6 to record audio separately. You could also run a wired mic to your phone using a Rode smartLav or something like that.
In the beta, I also don’t include a lot of elements in the videos other than just me talking and what’s on my Screenflow on the computer. In the final version, though, I might add things to the videos like layovers (text that pops up when you say certain things) and B-roll (camera footage that demonstrates things you’re talking about). But these things take time and effort to create, so it doesn’t make sense to create them until you have all the inputs and feedback you need to make them perfect. So, in the beta, as long as the videos and the lessons do what they need to do to help a person achieve that transformation, then you’ll be okay.
My first recommendation is to plan ahead in terms of how and when you’re going to develop your course content. Whether you decide to use video, audio, text, or a combination to create the content for your course, you need to plan what needs to be created, and when. Then, make sure to honor that time.
Even if it’s just one lesson per day because you’re strapped for time, honor the time you’re blocking out to create those course videos and lessons.
In addition, before you record each video, make sure to script it out. That doesn’t mean you have to stick precisely to the script, but you’ll save a lot of time and headache if you put in the work to create a script first.
The best tip I can offer you related to the production of these lessons is to take things one lesson at a time, and plan out how many you’re going to record or create in a given time period. Depending on the length of your course, the amount of time to produce all the course material could range significantly. We recorded the videos for 1·2·3 Affiliate Marketing over the course of two days that we’d blocked out just for creating the course. It was great to batch-process it that way, because I’d wake up each day and know exactly what that day would be about.
Now, let’s talk about production. Quality-wise, as we talked about earlier, video should be the main form of media for your course material. I recommend aiming for the highest quality video you can afford. You could consider hiring a professional videographer if your budget allows. On the other side of the spectrum, if video is truly out of your budget, you can create audio versions of the lessons, or simply written ones.
You also have an opportunity to enhance the course experience by providing bonus material and downloads that will enhance your customers’ learning and help keep them accountable. One of my favorite bonus items to add are worksheets for certain lessons to help reinforce the material. These act as “homework” for course takers that keeps them engaged by making sure that they’re not just consuming the material, but taking an active part in the learning process.
Another thing I like to do in all of my courses is have a list of action items at the end of each video the participant should complete before moving on to the next one. Again, this gets participants actively engaged—plus, people love to check items off a list!
You should also think about additional resources you can include in each lesson that complement the material, such as blog posts or podcast episodes. I also like to include downloadable resources that will help students get organized, save time, spur creativity, and support their learning. For instance, my Power-Up Podcasting course includes a number of ready-to-go templates students can use, such as a master spreadsheet to plan a year’s worth of episodes, a guest release form they can use before interviews, and a worksheet to brainstorm podcast marketing ideas.
Finally, although Step 7 is all about content creation for your course, you also want to make sure during this whole time that you’re keeping your pre-paid students updated. You can share tidbits and little hints of the course content. You can even give them a little “homework” to help them prepare for the first lesson. I actually did that for 1·2·3 Affiliate Marketing, and a lot of the students appreciated being able to get a head start on the course.
Pick your price
The final step before you start promoting your course to a small group of beta students is to pick a price point. Pricing a course (or any product, for that matter) can be a bit more art than science, but there are some guidelines that will help you find the right number for your course.
First, I recommended earlier that you focus on creating a premium experience with your course content, which will allow you to charge more of a premium price. There’s nothing wrong with having a course with lower production values that’s more affordable, especially if that’s what your audience seems to be looking for.
One way to start determining your price is to consider the nature of the transformation your course offers. Pricing can often be determined by how your course helps people:
- Make money
- Save money
- Save time
People generally put the priority in that order. A course that helps people make money can generally cost more than a course that saves someone time.
It can also help to do research on similar courses out there, not just in terms of your course topic, but in terms of structure, production quality, and promised transformation.
You can offer your beta testers a discounted price, especially since the course they see may not have all the bells and whistles the final version will have.
Keep in mind that once you set a price for your course, you’ll need to be careful about dropping it in the future. If someone buys your course for $497, then sees it for $397 a few months later, they’re going to be upset. If you want to drop the price, then you should also reduce the value that someone’s getting at that new, lower price.
Pricing is a big topic, and if you want to learn more, check out these two podcast episodes I recorded with Ramit Sethi, who is an absolute master at this stuff:
Step 10: Share your course and collect feedback
The next phase is to launch the course with your beta group. This step is going to provide you with a ton of great information you can use to make sure the course will be successful once you launch it to a wider audience.
Once the course is up and running with your beta testers, you’ll need a way to collect feedback from them to improve the course. Email and surveys are two good ways to do this, but the best feedback tends to come from one-on-one conversations and group conversations, like those that take place during group office hours.
It’s important to collect both positive and constructive feedback. This lets you identify what’s working well, what’s not so great and needs to be fixed, and what could be added to make things even better. Something I’ve gotten better with over time, thanks to student feedback, is not including unnecessary information in my courses. I got a lot of great feedback from my students saying, “You know what? I didn’t feel like I needed this to help me get there.”
Your students are the perfect ones to provide this feedback, because they are your target audience, so listen to them more than anybody. You’re going to get what you need to make your course amazing from the voices of your current students. Collect that feedback.
In addition, some of the best feedback I’ve gotten is simply from direct messages on Facebook. Sometimes I’ll just DM somebody and say, “Hey, I saw that comment you made on Facebook about the course earlier, and I just want to make sure you’re good. What else could I do to improve your experience with this course?” A lot of great feedback can come from a simple action like that.
Finally, as you’re collecting feedback, be sure to ask for testimonials too, because those are going to come in handy in the next step. The best way to collect testimonials, in my experience, is to just approach someone individually and say, “Hey, if you enjoyed this, and you’ve gotten some great results from it, I would love it so much if you’d take a few moments to leave me a testimonial.”
The more testimonials you can get, the better. The more diverse those groups of people who are leaving testimonials, the better, because they’re going to be able to help relate to more people. And people are not likely to give you testimonials out of the blue. Some may, but most people will only give you testimonials if you ask, and it is 100 percent okay to do that.
Step 11: Refine your online course
This one might seem obvious, but once you’ve collected all that great feedback, the next step is to refine the course. Redo the videos that need to be redone. Add worksheets where they’d be helpful. Remove anything that needs to be cut. Add text, animations, and B-roll to your videos to spice them up. Refine the course and make it great so that when you go public with it, it’s going to rock.
This step also includes refining the sales page. You’ve already gone through one round of sales, and you’ve likely helped some of your early students achieve those transformations. Hopefully you’ve also collected some great testimonials by now, and you can use them to adjust the messaging on the sales page. You can even include a new section with some of the best testimonials. Remember what we talked about in the first part of this post? When it comes to selling an online course, trust and proof are key, and testimonials are a great way to demonstrate that proof and cement that trust.
The last thing you need to do is hire a designer to create a logo for the course. If you already work with a designer, you can ask them to put something together for you. If you don’t, you can use a site like DesignCrowd to find a designer who can help out. They help entrepreneurs and small business owners outsource, or what they call crowdsource custom graphics, logos, and web designs from designers all around the world. They have over 500,000 designers from over 100 countries ready to help you with any creative and design projects that you might have. So, check out DesignCrowd.com to learn more and get started at DesignCrowd.com/AskPat.
Step 12: Launch and sell your course!
Congratulations! You’re finally ready to share your course with the rest of the world! You’re going to need to do some marketing at this stage, and that’s what we’ll talk about in the next section. But I have one last piece of advice I want to share with you before we move on.
Be confident
That transformation you promised them is now your responsibility, and you need to have confidence that you can deliver that transformation for them. If you had a cure for a disease, wouldn’t you want to make sure you got it to as many people afflicted with that disease as possible? Obviously, you haven’t created a cure for a disease, but you’ve still come up with a way to solve a specific problem through your course. So you should approach it in the same way, in terms of your certainty that it can help, your drive to make sure that as many people as possible can find it, and your confidence in the messaging you use to sell it.
The final thing I want to share with you in this section is a very important one. It’s a tiny phrase you’ll take with you moving forward, and it’s a big, big deal. What’s that phrase? It’s this: be confident. Through this whole process, you’ve created a lot. You’ve brainstormed and organized and outlined. You’ve done a ton of research. You’ve collected feedback. You’ve created a huge amount of content. You’ve done a lot of work to make sure that this course is something that can truly help people, that it’s a great solution for the problem you’re trying to help them solve, and that it can help them achieve the transformation you’ve identified.
And guess what? Some people are not going to be a good fit, or be ready for your course. And that’s great. When you can confidently say, “This is what my course will do for you,” you make it easier to weed out those who won’t benefit from it. You won’t be wasting anyone’s time, or upset anyone when they realize they’re getting something different from what they initially thought.
But when you mess around with the messaging, and try to please everybody, the result is that nobody will understand if the course is for them. They either won’t buy because they’re confused, or they’ll buy and say, “This is not what I signed up for.” You have to make it crystal clear for them, and that requires confidence in what you have to offer.
So go out there, and be confident. Make some sales, and then serve. Remember, you can sell and serve at the same time!
Brainstorm your next online course.
Download your FREE Online Course Creation Template, a workbook to help you refine your ideas and create a concise course outline.
How to sell online courses
You’ve built your course, and you even got a few people to buy it. That’s great—but what’s next? If you want to keep growing your customer base, you’re going to need to do some active marketing, and that’s what we’ll cover in this section. By the end of it, you’ll know exactly why people buy online courses, plus the specific strategies you can implement right away to start sharing your online course more widely and effectively.
The 3 must-know principles for selling your online course
- Principle 1: People Don’t Want to Buy Online Courses
- Principle 2: Trust and Proof Are Your Best Friends
- Principle 3: People Buy Online Courses Because They’re Convenient
There’s a lot to talk about when it comes to marketing tactics for effectively promoting an online course, from emails to funnels to Facebook ads to podcasts, blog posts, videos, all kinds of things, but the tactics don’t matter unless you get the principles right.
I’ve sold millions of dollars worth of online courses of my own (and as an affiliate for other people’s courses). And over the years, I’ve learned a ton by experimenting with different types of ways to promote online courses. In the process, I’ve learned a lot about the underlying principles that make your tactics work.
You could have the best tactics in the world, but if you don’t get these three principles right, then, well, you’re just amplifying a big mistake.
Principle 1: People don’t want to buy online courses
People don’t want to buy online courses. Wait, what? It’s true, though. Think about it: Nobody wakes up and says, “You know, I think I’m gonna buy an online course today.” Nobody. What people really want are the outcomes and the results that an online course could potentially give them. That’s the secret to selling anything. People want the transformation—how their life is going to be different after using that product. If you’re not clear about the results and outcome your course promises, then your prospective customers are not going to be able to make a clear buying decision, and your work promoting that course is going to be much harder.
This is why sales pages that focus primarily on the features of a course are less successful than ones that promote outcomes and transformations. For example, with my Power-Up Podcasting® course, I promise you’ll have a podcast up and running with listeners on the day you publish your first episode. Compare that to a sales page that only exclaims how the course has five modules with thirty videos and office hours.
As you promote your online courses, keep in mind the desired outcome that your target audience has—and if that desired outcome is not desirable, well, then you probably shouldn’t be promoting or selling that course anyway.
People don’t buy courses. They buy outcomes and transformations.
Principle 2: Trust and proof are your best friends
Let’s get this out of the way first: it’s not easy to sell courses online. Let’s take in contrast, for example, a piece of software that does a specific thing in a very convenient way. A potential customer can easily imagine using that software to solve a specific problem they have and seeing the result immediately.
For example, here’s a screenshot of a Mac app that arranges your files and apps on your desktop for a more organized experience.
The transformation is obvious—you can see it in the picture!
With online courses, however, the outcome isn’t as easy to show in a single screenshot. Since you’re dealing with information and learning, quickly demonstrating the potential results someone will see can be much trickier. And in many cases, people aren’t going to get results the moment they buy, the way they would with a desktop organizer app. They have to actually take action and spend time before seeing results.
When it comes to selling online courses, trust and proof are your best friends. People need to trust that you’re selling them something worthwhile, and they need some sort of evidence that your course will do what you say it will.
If you’re selling an online course, ideally you’ve started building trust long before you start marketing the course. As we talked about above, you need to do the work of building an audience, finding out what they need, and delivering value before you start pitching your course.
In episode 1081 of the AskPat Podcast, Mio has an amazing offline business, but how can she take it online to grow her audience there? We talk about Mio’s superpowers, and how she can use them for good to build an online community for her business.
Then there’s proof—specifically social proof. What is social proof, exactly? It’s a way of letting other people show that your course actually does what you say it will.
One of the most powerful ways to provide this proof is through the stories and testimonials of people who have taken it and achieved the desired transformation. The easiest way to start taking advantage of social proof to market your course is to ask your beta group for testimonials, then infuse these stories in your marketing messages:
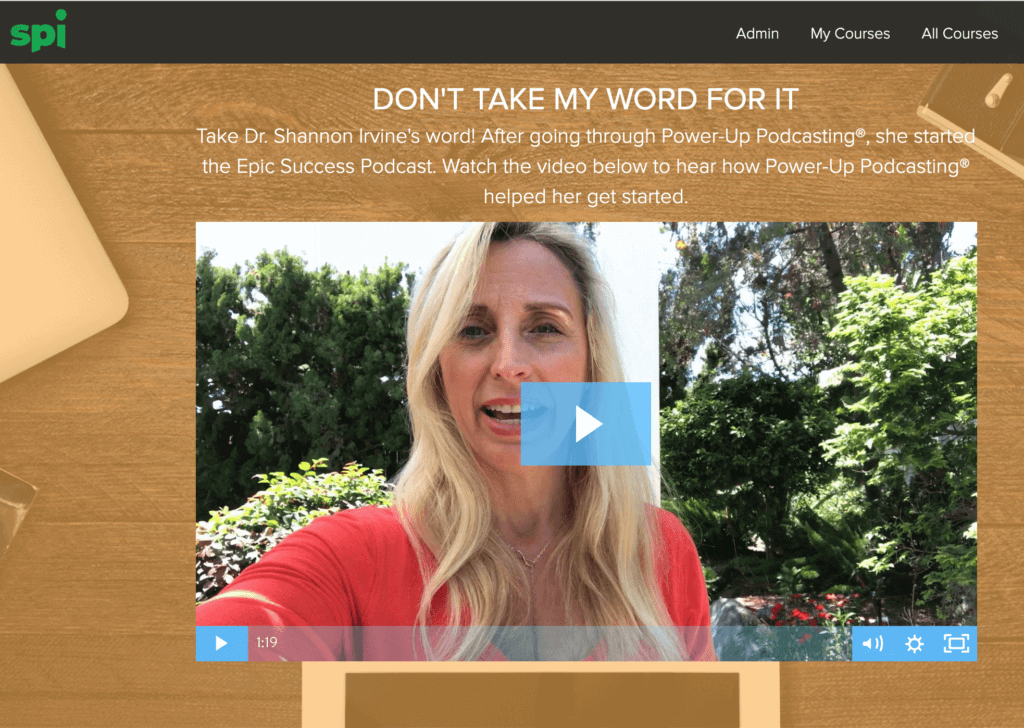
I first learned about social proof from an episode of the Internet Business Mastery podcast. One of the hosts talked about how he was at a farmer’s market and was looking for something good to eat. He went to the food vendor area, where there was a super long line at one of the stalls, much longer than any of the other lines. That’s how he knew that was the place to get food. Because there were so many people there, it must have been worth waiting in line for.
In that case, the form of social proof was numbers. How can you take advantage of numbers in your course marketing? You could add a note to your course sales page that thousands of people have taken the course and 98 percent of them were completely satisfied. Those numbers are a powerful signal to a prospective customer that this is a course worth taking.
There’s nothing more powerful than having other people do your marketing for you.
What if you’re just getting started and feeling stuck because you don’t have any course testimonials yet? Three things can help:
- Offer a beta of your course to your first batch of students so you can get some feedback before you go live publicly.
- Offer a version of your course to one person who can go through the content and give you feedback on it. You’ll be surprised how much one person’s experience and feedback can change things for you and how you approach the content and selling in the course. It’ll also help you unlock some of that much-needed confidence.
- Share proof or testimonials not about your course, specifically, but rather about you. People want to know they can trust who they’re buying from, especially online, so offer some reassurance. Who have you worked with? Who have you helped in some way? Think of it like a letter of recommendation from someone who you’ve helped. Ideally, this feedback is related to the topic of the course, but it doesn’t have to be.
Principle 3: People buy online courses because they’re convenient
This third principle might sound a little ridiculous, but don’t be scared—I’ll explain. For most online courses out there, the information in those courses can be already found for free elsewhere on the internet, on places like Google or YouTube or even on social media posts. When you really think about it, it’s kind of obvious. There’s rarely any brand-new, never-before-mentioned-in-the-history-of-time information in any of these courses.
So why would people ever buy these courses? I learned this important lesson back in 2008 when I sold my first online product, which was an ebook study guide to help people pass the LEED exam, a very specific exam in the architecture space. That ebook was made up of 95 percent of the same material that could be found for free on my blog. In fact, right before I started selling it, I remember being scared to death of the thought that every person who bought it would ask for a refund and complain about that very fact.
How many people complained and asked for their money back? Zero. Not one person out of tens of thousands of copies sold made a peep.
Does that mean people are just too lazy to complain and ask for a refund? Not at all. Trust me, if people aren’t happy with their purchase, they’ll be quick to let you know and ask for their money back. We’re not running a gym membership here.
You see, the reason people buy online courses, beyond the desired outcome and the trust you’ve built with them, is because it’s simply convenient. You’re saving them time and energy by providing the information they need, and only the information they need, in one place for them to take action on and get results. Take Uber. Think about it. What does it do? It helps you save time and energy hailing a cab. What about upgrading to Early Bird seating on Southwest so you can sit up front? Is it because you like the front seats? No, it’s because you like to save time and energy getting on and off the plane.
Likewise, do people love to sit down in front of a computer and take an online course? Not necessarily, but doing that is a whole lot better than spending time and energy to search for and gather all the information they need to achieve their desired outcome. It’s much more convenient to sit down and take the course, which will have all of the information in one place.
Of course, there’s a bonus with online courses beyond mere convenience, and it’s the additional support you can provide your students on their learning journey. When people are looking for the information they need on their own, there’s no one else there to help them and to hold them accountable for their progress. People want their hand held, they want accountability through the process. It might be through something like weekly office hours, or via worksheets attached to each lesson that keep the student engaged. When a person decides they want to take your course and pay money for it, they’re putting skin in the game, and that alone is powerful for keeping them accountable. But it’s your responsibility as a course builder to make sure that they progress and get the result they’re looking for.
Some basic course marketing options
All right, with that out of the way, let’s talk tactics and channels! Thankfully, marketing a course isn’t that different from marketing any other product you might be selling. You likely have a number of channels, platforms, and tactics available to you to market your course, including:
- Your email list. The bread and butter of your online business. Create a series of emails with helpful free content related to your course topic, eventually leading to a sales email for the course.
- Webinars. A popular tactic in course marketing is to host a free webinar where you give away free information related to the course topic, then pitch the course at the end.
- Podcasts (yours and others). Podcasts are still one of the best ways to engage and grow your audience and demonstrate your authority.
- YouTube. I recommend using video as the main form of content in your course because it’s so engaging, and the same applies to your course marketing. Create a promo video, or even share a video from one of your lessons for free.
- Affiliate partnerships. An advanced option once your course is established, affiliate partnerships are a powerful way to market your course by appealing to another person or brand’s similar audience.
- Word of mouth. Remember that word of mouth is one of the most powerful marketing methods out there. Happy customers tell other people.
- Paid advertising. Paid ads via Facebook and Google AdWords can be a helpful way to grow your course audience, though I recommend trying paid advertising only after you’ve got your course off the ground and are making some sales.
This is just the tip of the iceberg when it comes to ways you can market your course. In episode 979 of my AskPat podcast, I shared a couple of specific course marketing ideas with Tsh Oxenreider, including the benefit of creating anticipation with a waitlist.
Course launch example: Power-Up Podcasting®
When it comes to marketing your course, perhaps the most crucial phase is the course launch.
In 2017 I publicly launched my Power-Up Podcasting course. To support the launch, we spent an entire month only producing and promoting content that was podcasting-related. Through blog articles, YouTube videos, and social media posts, we used that content to do a few important things:
- Explain why podcasting is important
- Show people how to get started with their own podcast
- Address every objection someone might have that would prevent them from getting started
We designed all this content to be both free and valuable. We also created a lead magnet that would get people onto our email list, where we could continue to communicate with them up through the launch date (and beyond). That lead magnet is a PDF called The Podcast Cheat Sheet, and it provides a framework people can use to start designing their podcast: coming up with a show idea, figuring out how to brand and differentiate their podcast, and even starting to think about the content of their first few episodes.
The Podcast Cheat Sheet also provides a checklist of everything they need to do to get started. That checklist isn’t just a couple of items—it’s a couple of pages of all the things you need to do to get your podcast up and running. This cheat sheet gives people enough to get started, but it also makes them excited to learn more and keep going—and that’s where Power-Up Podcasting comes in!
When we finally launched the course, we crushed it with over $300,000 in sales. The pre-launch marketing had given people something to think about and start planning toward, and once we finally gave them the opportunity to work further with us, lots of them jumped on it.
We also experimented with another opportunity for course customers beyond the course itself, which was a live two-day workshop in San Diego where they could fast-track the process of getting started with their podcast. We sold tickets to the workshop in conjunction with the course, and fifteen people grabbed one. We’ve been running the Power-Up Podcasting Fast-Track Workshop every year since then, and it’s been a big hit. (Editor’s Note: We no longer run the in-person workshop; instead we offer multi-week course accelerators inside our SPI Community).
Evergreen vs. periodic launches
In general, marketing a course isn’t that different from marketing any other service or product you offer. However, there is one big consideration that’s relevant to courses in particular that will have a big effect on how you plan your course marketing: whether you opt for an open or closed launch.
One of the biggest questions you’ll need to answer when it comes to how you market your course is whether to make it available year-round (evergreen) or periodically. There are benefits and drawbacks to each option, so we’ll talk about them now.
For a beta launch, and possibly your first public launch, I recommend going periodic, sometimes known as an open-and-close launch. The main reason is that in the beginning, a periodic launch is going to be more manageable for you. Having a defined period when the course will open and close lets you focus on working closely with your beta students and having them help you make the course the best it can be.
Even after you’ve been offering your course for a while, having periodic launches may be better if you have a small team (or a team of one!) and don’t have the resources to handle year-round management of your course and its customers.
The other potential benefit of a periodic launch is that it creates a sense of scarcity that may incentivize potential customers to act. At the same time, some course creators aren’t comfortable with the idea of creating artificial scarcity. I think it’s up to you to determine your comfort level with this approach.
Making your course evergreen is a good option if you don’t like the idea of creating scarcity and you have the ability to handle your course promotion and management year-round. Once you’re happy with your course and you have the systems and/or personnel in place to help you run things year-round, you can move into evergreen mode. Ideally, you have someone on your team who can split the duties. For instance, the other person could handle the logistics of the course itself (payments, customer support, etc.), so you can focus on the marketing end, if that’s your jam.
Here’s a deeper dive into creating evergreen sales funnels for your courses and other products.
The option you go with—evergreen vs. periodic—will have an effect on how you market the course. Your evergreen course marketing is likely to be more steady and consistent, whereas your periodic launch marketing is going to have ebbs and flows depending on how many times you open and close the course each year.
In the end, neither approach is better than the other in every situation, and it’s really about your personal comfort level, resources, and preferences. There are pros and cons to each approach, so I definitely recommend testing and experimenting to find the right fit for you and your course. If you try something and it’s not working, try something else. The only firm recommendation I have is that your beta launch should be periodic, but after that, the world is your oyster!
Building audience trust in affiliate partnerships
Earlier in this guide, I mentioned affiliate relationships as a powerful way to grow your course audience. Many course creators opt to work with affiliates who promote their course and get a small commission for every person in their audience who buys the course. These types of arrangements can work out great for both parties, but they can also present pitfalls when it comes to building trust if you don’t go about things thoughtfully.
You see, even once you’ve built solid trust with your audience, there’s a danger in “shuttling” them over to somebody else without laying down the right foundation first. It’s almost like saying, “Now that we’ve gotten to know each other pretty well, I’d love to introduce you to my friend over here. You’ve never met him before, but he’s gonna ask you to buy something.” In real life, that’s not going to come across very well—but unfortunately, that exact thing happens online a lot.
Beyond promoting a course that offers a desirable outcome for your potential customers, the most important thing to do is convince your audience that the person creating the course is the right person to teach them that material. So how do you do that? One way I’ve done it is to interview the creators of those online courses on my podcast, which is also a great relationship-building tool. Most of the time, I promote courses that I’ve used myself. I talk about my own experience and what I loved about it and why I appreciate the care that the course creator put in to help me achieve success. And if someone in my audience has taken their course, I’ll use their examples and stories to help promote that course as well.
And all of the same tactics apply if you’re asking someone else to promote your course as an affiliate. If they have a podcast, you can have them interview you on it, or maybe write a guest post on their website. If they or anyone in their audience has taken your course and succeeded with it, you can ask them to share those stories with the rest of their audience.
More reading and learning on how to market your online course
If you already have an established online business and you’re adding a course to expand your offerings and serve your audience in new ways, then you hopefully already have a solid marketing strategy in place for your brand, and a grasp on the most effective tactics and channels for you.
On the other hand, if you’re just getting started and are planning a business around an online course, you may need to spend more time getting a marketing plan in order.
Everything that goes into becoming an effective digital marketer and creating powerful sales funnels, for your course or any other products or services you offer, is definitely more than we could cover in this guide. If this is an area where you could stand to learn more, then I want to share a few additional resources with you.
Read more about why I recommend starting with a periodic launch for your course.
On the other side of the equation, here’s a great interview with author and sales funnel expert Nick Stephenson on how to set up successful evergreen funnels for your course:
And here’s something you may not even think about until you’re dealing with it. How do you promote a course that’s geared toward kids appropriately but effectively?
Finally, I highly recommend you go through these resources on our site:
- The SPI Beginner’s Guide to Branding
- The SPI Guide to Winning Webinars
- Build Your Own Brand
- Smart From Scratch
More online course creation and marketing tips
You’ve learned the basics, and maybe even started building your first online course. Now I’d like to share some of the best online course creation tips I’ve learned in the past few years of creating my own awesome online courses and helping others do the same.
The 12 lessons I learned testing and launching my first online course
I learned a lot through the process of creating and launching my first paid online course, Smart From Scratch®, back in 2017. These lessons still resonate today, even after creating and launching four more paid courses.
To be fair, I had already developed a course before Smart From Scratch: the free companion course to my book Will It Fly?. But diving into my first paid course was a different experience that posed a bunch of new challenges and taught me several key lessons. Here are the seven biggest ones.
Lesson 1: It’s not easy
Believe it or not, creating a comprehensive course with clear objectives isn’t easy. My team and I put a ton of effort into the course design and beta experience for Smart From Scratch. Thankfully, we had our experience creating and launching the Will It Fly? companion course, and that definitely helped make the process a little easier. As did using Teachable as a platform (which we’ll talk more about later in this guide). But each of the videos within the course required outlines, and they needed to be done well. The course design mattered. The structure of the course needed to make sense for the students. The material needed to truly inspire. And of course, people needed to come away with the promised transformation at the end.
There are two things that really helped me through this:
- Inspiration from my peers. People like Amy Porterfield, David Siteman Garland, and Michael Hyatt all helped me immensely. I took their courses to help get me into the mindset of a student and to see how truly helpful I could be with my own course. In the process, I realized that Smart From Scratch was something my audience was asking for, so I needed to build it. If I had let fear or uncertainty get in my way, it wouldn’t have been possible. But thanks to my peers, I was able to see through that.
- Beta customers. The founding students of Smart From Scratch were integral to creating what the course has become. If you’re thinking of creating and launching your own course, having a beta group that can help you validate and refine the course is an absolute must.
That second point leads me into the second lesson I learned while testing and launching Smart From Scratch.
Lesson 2: Be open to feedback
If you’re not open to feedback—in anything—you’re not going to have room to grow and improve.
This needs to be said again and again: The feedback I received from the Smart From Scratch beta students was vital. From the positive feedback to the eye-opening criticism, all of it has been so helpful. It afforded me the opportunity to hold back from selling the course publicly to collect feedback early, tweak it, refine it, and make the course better to sell later. From a business perspective, that’s such a huge deal, and for that I’ll be forever grateful for their amazing insight throughout the process.
Lesson 3: People like structure and convenience
During the course creation process, one of many things I validated was this: People like structure. With Smart From Scratch, they benefit from a hands-on, step-by-step process for testing and validating their business idea. Essentially all of the information in the course could be accessed by reading Will It Fly? and browsing SmartPassiveIncome.com. With YouTube and the wide and wonderful internet, so much information is out there.
But the difference with a course like Smart From Scratch is the structure and convenience of it. Sometimes it’s easier to consume and learn information when it’s structured, like in a course with built-in accountability and community.
If whatever you’re trying to sell, whether it’s a course or physical product, is structured in a way that makes people’s lives easier, you’ll win.
Lesson 4: Embrace the community
The fourth lesson I learned while testing and launching Smart From Scratch was just how amazing a community can be. The SPI community is so great, so it really shouldn’t have surprised me, but it did. Going through the course and working with the students, hearing feedback in multiple ways from surveys within the course, reading the messages in the groups and in emails—all really inspired me. It really showed me how lovely and supportive our community of entrepreneurs can be. And it proved to me why Smart From Scratch needed to exist.
All of my audience’s feedback and stated wins along the way really motivated me and spurred me to continue creating courses and connecting in that way with my audience. It is, without a doubt, one of the more enlightening and rewarding experiences I’ve had.
Lesson 5: Create ways for students to interact
One thing I wanted to do with the Smart From Scratch experience was give students a means to interact with one another. I wanted them to be able to ask questions, get feedback, and connect with me throughout their learning journey.
So we created a Facebook group for the beta students, and kept it open for students after the public launch as well. The Facebook group (which you can create on Facebook for free) has been amazing for helping people to get through it together, for asking questions, getting feedback, and staying motivated.
I was worried that some people wouldn’t be able to access Facebook. And that may be the case sometimes, but it’s not the norm. Giving people a safe place to communicate with one another is essential. And Facebook makes it easy because you can set up notifications that go straight to your email.
So, if you develop courses, remember to create an easy way for your students to interact and communicate with each other—whether that’s on Facebook, in a forum, or elsewhere. It’ll make a huge difference.
Lesson 6: Provide office hours
Having office hours throughout the course to answer questions for students is a super high-value proposition. For Smart From Scratch, the office hours were key because we were able to get the beta students together to answer specific questions, whether they asked them through chat or directly on camera (via Zoom).
Getting people together so that they can ask questions and interact with the group is highly encouraging for everyone. Even people who are sitting on the sidelines listening to these questions and my answers are still getting a lot of benefit because a lot of them have the same questions.
I did find initially that only a small percentage of people were attending these office hours, so I’d try to mix up the hours, having them early in the morning, sometimes later in the evening, and mid-afternoon. Offering different times helps ensure that as many people as possible have an opportunity to talk, especially if you have international students in various time zones, like I did with Smart From Scratch.
Now onto the seventh and final lesson I learned while testing and launching my first online course!
Lesson 7: People are busy (But encouragement helps)
The seventh and final lesson I learned while testing and launching Smart From Scratch, is that people lead busy lives. With that in mind, it’s hard to expect everybody to get through the whole course in the timeframe you may want or expect.
Even after the course was launched, there were still people from the beta group who had yet to get through all the videos in the course, and it was simply because life gets in the way. I tried to do my best to encourage them through various means, including the Facebook group and in office hours.
One thing that I didn’t do for the Smart From Scratch beta group but implemented with the course’s public launch (and every one of my courses since then), is to send emails to students while they’re taking the course. This can be really rewarding and motivating, especially if the emails can answer questions your students may have, or feature a success story that may motivate them. Be a cheerleader for your students, and they’ll be that much more likely to succeed!
Lesson 8: Give away a piece of the course for free
Giving part of your course away is a great way to get people excited about upgrading to the full thing. The simplest option is probably to give people access to the first module (or part of it, depending on how many modules your course has). You could even give people full access to the course for a limited time, like a week.
Another option is to offer limited access to the course community, like letting people view Facebook conversations but not contribute to them until they purchase the course.
Whichever way you’re leaning, I definitely recommend testing different options to see what works best for you and your audience. If you use a course platform like Teachable, you can also see whether people have accessed their free module and how much progress they’ve made.
Lesson 9: Got a book? Create a companion course
If you’re an author trying to build your audience, then a companion course might make a lot of sense.
For two of my books, Will It Fly? and Superfans, I’ve created companion courses. Each of those courses has been a big success in helping me stay connected to my readers, by giving them extra value for free and asking them to join my email list when they sign up for the course. Many people who took the Will It Fly? course have also ended up purchasing my paid courses.
Since you’ve already written the book, creating the course is going to be a little easier than if you were starting from scratch with a brand-new course. You can create lessons to match each chapter of the book, with all the links you mention in the book chapter, plus additional resources that might be helpful for your reader.
Lesson 10: Consider hiring a professional videographer
If you’re serious about using high-quality video in your course lessons, consider hiring a professional to help you out. Anyone can set up their phone and record a basic video, and that might be all you need for your beta course. But if you’re trying to create a premium experience for your course takers and charge a premium price for it, a professional videographer will have the expertise, knowledge of lighting and filming techniques, and access to the top-end equipment that will make a huge difference in your video quality and your students’ experience.
If you want to know more about what it’s like to work with a professional videographer, check out this podcast interview with Caleb Wojcik, who’s been helping me create awesome video content for a number of years.
Lesson 11: Look out for course thieves
Chances are good that 99.9 percent of the people who buy your course, or come across it, have good intentions and want to pay you for it. Unfortunately, there are people out there who don’t like doing things ethically, and you need to look out for the ways your course material might be used improperly.
First, there are unscrupulous online course creation websites out there that resell other people’s courses at a hugely discounted price. How do they do that? They basically buy the course, steal the content, upload it to their own site, then in some cases request a refund using some excuse. There are several such sites out there (that I won’t link to for obvious reasons), and you need to be aware of this phenomenon if you’re going to be creating and selling your own courses.
While you can’t completely guard against this happening, you can still include elements in your course experience that can’t be easily stolen or replicated. These are the ingredients we talked about above: community, accountability, and access to you, the expert. A great course is more than just a container for content and information.
There’s another scenario that exists in an ethical gray area, and while it’s not as bad as someone stealing your course content, it’s something to watch out for: people sharing course logins with others so they can take your course without paying for it.
In this podcast episode, I go into more detail on what to do when someone gains access to your course material without paying, or just outright steals it.
Lesson 12: Listen to this interview with Ankur from Teachable
As you’ve learned so far in this guide, online courses can be great for evangelizing your business, building community, growing your customer base, and providing massive amounts of value to your audience. Ankur Nagpal, the creator of the online course platform Teachable believes this too. In this podcast episode, Ankur revealed a ton of amazing insight that any course creator can benefit from.
This podcast episode is an absolute must-listen, so check it out. You’ll learn:
- Everything that goes into a great online course.
- Strategies for turning your students into customers.
- The biggest obstacle for first-time course creators—it’s simpler than you think.
- The secret to pricing your course.
- Tips for reinvigorating students who drop off or lose interest.
I also asked course creators in my audience to share their best tips and lessons learned from creating and marketing their own courses. I got some amazing input, and I want to share the 26 best tidbits they sent me. You’ll notice that some of them share really similar tips, and I don’t see that as a negative! On the contrary, it reinforces how important some of these best practices are to having a successful course.
Want to know what those 26 online course creation tips are? Read on!
26 course creators’ best tips for creating and selling online courses
1. Do not prepare an online course for selling. Create an online course for what you love to do and then sell it. You will earn a lot if you sell a topic that you love to do. – Resit, Master of Project Academy
2. Stop worrying all the time about how you will sell your course and start worrying about how you will create such a good course that will provoke a real change in your students’ lives. Then, I promise you the money will come. Great content means good reviews, and good reviews mean more money. – David Perálvarez, Club SiliCODE Valley
3. Build content that people can’t find anywhere else in the world for the same price or at the same level of quality. If you do both at the same time, sales will roll in like crazy. – Dakota Wixom, QuantCourse
4. Stop making excuses as to why you aren’t qualified to teach, set a deadline, and commit to that deadline. Do not let yourself get distracted by trying to make everything perfect. It will never be perfect. Strive for professionalism, but don’t derail yourself in the chase of perfection. You can’t fix what you don’t launch. So launch it, learn, tweak, and repeat.
I lurked around the SPI and Teachable communities for 14 months. I listened to all the course-related podcasts Pat did. And I got stuck in a cycle of trying to gather all this intelligence. I wish I had stopped going into “research” mode and just committed that time to DOING IT. Finally, in January I committed to launching my course by the first week of March. I did it and got 52 students. I was actually literally sitting in the audience at a conference Pat was speaking at and I was getting student after student and refreshing my app to see how much money had come in!
It was an amazing feeling and I only wish I had done it SOONER :).
– Sarah, User Research Mastery
5. For a fast and profitable launch, plan a launch on Instagram. We flipped $2k in ad spend into $60k worth of sales on our Teachable course. Micro-influencers are the way to go! – Julie Cabezas, Social Brand School
6. Each one of us has a secret passion. Maybe you know more about Star Trek than anyone on this (or any) planet. Maybe you can recite the relative strengths and weaknesses of every car on the market. Maybe you have all your grandmother’s recipes for your family’s special foods. You think you’re the only one who cares about these things. You are not. Use your secret passion as material for an online course and people will respond. Because people respond to passion. – Eric Goldman, Profit Leader Academy
7. Test your idea first. Don’t waste any time creating a course unless you have a solid list ready to buy it. Start small with blog posts and expand as the traffic steadily increases. Launch your course when your audience starts asking for it. – Sarah Crosley, The Creative Boss: Create the Ultimate Opt-In Offer
8. Don’t wait . . . set a date and get out there and pre-sell (better yet, create your webinar date to launch your yet-to-be-created course). Nothing will light a fire fast enough knowing that you have to get it done. – Susie Parker, Family Success Academy: Baby Naps Made Easy
9. No course is ever perfect when it launches. If you try to make your course perfect before you launch, you will NEVER launch. It’s okay to start with an initial version of your course that you improve on after receiving feedback from your students. – Daniel Milner, Make TV Easy
10. The number one thing people need to know is to sell something that people actually need. And then know a thing or two about marketing to sell it. Love Pat Flynn. Love Teachable. Love helpful people and making a living doing it! – Jen Kamel, VBACfacts Academy: The Truth About VBAC™ for Professionals
11. Teach MORE THAN your competitors for FREE. Selling is nothing but teaching genuinely. If you just teach without holding anything back, genuinely, and help people, everything becomes very easy. Why I am saying this? Because it’s not something I had planned before my course launch. It’s something I realized last month. My “Aha!” moment. After looking at the last 4 months’ stats.
I did $20,000 in sales in the last 4 months without running a single Facebook ad or any kind of promotion. I have just 11 videos on my YouTube channel. But those 11 videos teach more than other paid courses. Somehow people are finding those videos, getting amazing value, and subscribing to my paid course. – Mubaid Syed, T-Shirt Profit Academy
12. Roadmap actual deliverables and stick to a schedule that’s conducive to producing the outcomes you need to meet your plan. Too many entrepreneurs spend three years “making” a course, and not a single buyer will ever be exposed or even hear about it!
Our current course is doing well over $25k/month in recurring and we’re moving all of the outside stuff into Teachable as we speak! – Scot Smith, Automated Inbound: Rainmaker University
13. Plan out your marketing and promotion strategy even before you build your course. – Amir West, Online Entrepreneur Life: Amazon Phenomenon
14. Business success is not dependent on the size of your email list, nor what you’re passionate about. A large unresponsive list is a massive cost centre and your passions don’t mean a thing if people don’t want to pay for it.
Find a deep unmet need or hidden desire waiting to be addressed. Address that in your course, and then make THAT your passion. If you can do that, even a small list can be very responsive and profitable; and you’ll have a thriving business. – Vikram Anand, Get Ahead Fast™
15. It’s all about creating a detailed, powerful outline. Armed with that, you’ll know how much of your course you can give away for free to attract the right audience, which parts of your course to promote or add to your blog/podcast, and how to build a sales page that highlights what you’ll share with people. – Regina Anaejionu, Business School for Humans: Monetize and Market Your Mind
16. Whatever topic you have in mind right now, make it 5 times smaller. The biggest mistake is to think you have to cover everything in one step. – Kerstin, Fluent Language School
17. Just do it! Perfection kills progress. Like Pat, I live in San Diego. I’m a huge fan of the show. I literally shot my class in my living room. I duct-taped together my first sales funnel and I was trying and failing at Facebook ads on Black Friday (my launch day, which now I hear is the WORST day to launch anything, LOL). Now a few short months later it has made about $50,000 and enrollment has been closed much of that time. Testing deadline funnel now. Yes I will be adding more courses ASAP! – Gina Downey, Academy for Dance
18. VALIDATE, then create. Before pouring time and money into an online course, make sure that people will buy it by actually ASKING people to buy it! You may be able to get 100 people to sign up to be beta testers for your course, but if no one is willing to pay you for the course, then it’s not worth creating.
When I created my first online course, I sent a few people in my audience a personalized email where I gave them a description of what the course was and what it would include. If they were interested, I asked them if they wanted to pre-purchase the course at a special rate (yes, before it was built!). I made $8,000 off of the pre-sale, which validated that people wanted my course. I spent the next few months creating the course, and launched to my list of only 2,000 at the time. My first launch did $41k in sales. Validate the idea, then create the product. – Abbey Ashley, The Virtual Savvy: VA Bootcamp
19. The number one tip I would give to course creators is start building your list immediately. Always be growing your audience and remember to nurture it as you grow. If you have a great audience who wants to hear what you have to say, you will be successful in your online course creation and sales! – Fleur Ottaway, Venture Digital: Get Results from Your Facebook Ads
20. Jump and then figure out how to open the parachute. I started my course live before I had all the content developed. Each week I had 15 people who were showing up to my office to learn, so I needed to make sure it was ready for them. Eight weeks later my course was developed, recorded, and uploaded to Teachable. Over $70k in 6 months later and I’m happy I didn’t wait until it was “ready.” – Gregory Bottaro, Catholic Psych Academy: Take Control of Your Life Today
21. Don’t pressure yourself to create one module or even one PDF of the course BEFORE you’ve pre-launched and pre-sold the idea. That pressure can be a major mental block, and you’ll never take action to get it out of your brain and into Teachable (#speakingfromexperience).
So instead, craft your pre-sales campaign, do that, and then once the dollars are in and there’s PROOF that your people are willing to put their money into your idea . . . then your mental blocks will magically turn into action. – Elise Darma, InstaGrowth Boss
22. Overcome any hesitations, any procrastination, any fear by writing a list about how fabulous you are, how helpful your course will be, what benefits you’ll be bringing to their lives. Jump up and down, get super excited, and GO! You’re now in the right buzzing mindset and vibrational vantage point to pour the right energy into your work. YOU’RE GOING TO NAIL IT! – Heather, The Brain Trainer
23. Differentiate yourself and your course. Don’t be one of a thousand teaching HTML, or healthy lifestyles. Find something that makes you different. Find a way to be different. It’s the only way you can stand out and build a real business. If you’re the same as everyone else, no one has a reason to enroll in YOUR course. Differentiate yourself and make that differentiator your competitive advantage. – Mark Lassoff, LearnToProgram: Become a Professional Developer
24. Find one person and walk them through your exact process of the course you’re considering creating. Each step of the way becomes your working outline for the course and helps identify any steps you might overlook. As an added bonus, this person becomes your true raving fan and an amazing testimonial. Teachable rocks! – Jeff Rose, The Online Advisor Growth Formula
25. Engage with your audience. Focus on helping people, money will follow. – Sam (Sanjay) J, TIBCO Learning
26. Sell as you create! By sharing what you are working on, your fans feel like they are part of the process and they will be rooting for your success. Plus they will be thinking about getting the class when it comes out. I think it is enticing to know about a product that you can’t have yet and by the time it comes out they have convinced themselves that they need it and they jump at the chance to buy. Offering a special price for early buyers also removes a consideration and makes the purchase a no-brainer. Just make sure you deliver the good so they will come back for the next class – Lindsay Weirich, Essential Tools and Techniques for Watercolor Painting
I hope all these online course creation tips and best practices come in handy as you’re building and launching your course! But what about the flipside—the things you shouldn’t do if you want to have a successful online course?
The top 11 mistakes to avoid when creating and marketing an online course
When you’re creating your first online course, you’re embarking on a big learning experience. And like every learning experience, this one is likely going to come with its share of mistakes. But thankfully, the mistakes you’ll make as you’re building and launching your course are rarely ever fatal! And to help you get ahead of some of these mistakes so you can avoid them in the first place, I’ve compiled the top eleven mistakes I’ve either made myself or seen other course creators make.
Online course mistake #1: Not determining what your audience needs
I put this one first because I consider it far and away the biggest potential mistake you can make with your online course. If you were to ask ten course creators what they think is the worst thing you can do when designing a new course, nine of them would say that it’s this: not asking your audience what they need first.
It’s a dilemma that faces online entrepreneurs everywhere, whether they’re trying to create a new product, service, class, or anything they want people to pay them money for. If you create something you think people will want, then try to market it to them, it may or may not work. But if you do the work upfront to uncover your audience’s unspoken needs and challenges, and discover exactly how they talk about those needs and challenges, you’ll know precisely what needs to go into the product or service you’re about to create, and the language to use in selling it.
Online course mistake #2: Not asking for feedback
Feedback is your best friend. You should definitely be getting lots of feedback from your online course beta testers, but don’t turn off the feedback loop once you launch your course to the public. Your wider audience is also an amazing source of feedback—and students are going to give you feedback whether you want it or not, so ask for it anyway! There are plenty of ways that student feedback will help you improve your course content and experience, and the rest of the mistakes in this section will detail some of the specific ways that feedback is crucial to the creation of a great online course.
Online course mistake #3: Not keeping your course content up to date
One mistake that can fly under the radar for many course creators is not making sure that you’re teaching relevant material that’s still accurate when your students are consuming it. Especially if you teach in a fast-moving industry, things are going to change, and you need to have a plan to update your course content as necessary. For instance, in 2019, we did a big refresh of my Power-Up Podcasting course (now known formally as Power-Up Podcasting®️). Podcasting is such a popular and fast-moving space that a lot had changed in the few years since first launching the course.
As you’re initially creating your course content, take note of items that might need to be updated at some point in the future. Perhaps you recommend a particular podcasting mic as I do in Power-Up Podcasting. If a better mic comes along, or your recommended model gets phased out, you’re going to want to find a replacement recommendation.
You should also try to avoid including references in your content that will become dated, like mentioning the current month or year when you’re recording a course video. The less you need to update later on, the easier it’ll be for you.
Again, student feedback is going to be really helpful here, but you’ll be better off if you can anticipate what needs to be updated before your customers tell you something’s out of date.
Online course mistake #4: Waiting too long to launch
I get it. You’ve been working on your course for months now, and you want it to be amazing when you finally share it with your audience. But if you do that, you’ll be wasting a huge opportunity to grow your audience, build trust, and get feedback you can use to improve the final course.
Instead of focusing 100 percent on perfecting your course, you should set aside time and energy to build your email list, set up a landing page, produce helpful content—all the things that will help you build your brand and get people interested in what you have to offer. That’s going to be ultimately much more valuable when you do launch your course because you’ll have attracted the right audience to match your brand, your style, and what you have to offer.
And it’s worth repeating that not waiting until the course is “done” is an opportunity to get that super-valuable feedback from beta students that will help you make it as useful as possible for your audience when you launch it publicly. In AskPat Session #203, I give Stan the same advice I just shared above. Check it out.
Online course mistake #5: Not promoting enough
In 2017, my first full year as a bona fide course creator, I launched two courses publicly: Smart From Scratch®️ and Power-Up Podcasting®️. But I didn’t do nearly as much as I could have to promote them.
I used my email list, as well as a few Facebook ads, to promote the courses, but I could have done a lot better if I’d taken advantage of my other platforms, namely my blog and my podcast.
My podcast has been one of my most impactful platforms, and there was one instance in 2017 where promoting Power-Up Podcasting on the podcast really paid off. In one SPI Podcast episode, I interviewed three students from Power-Up Podcasting. They talked about their experience as new podcasters and with the course. After the episode came out, I saw a significant bump in sales. I also received a bunch of messages from people who told me specifically that the episode inspired them to sign up for Power-Up Podcasting.
I wish I’d done more of that sort of thing!
Are you using all of the forms of content you already use to help promote your course? And remember that you can cross-promote content in one channel via another channel, like linking to your YouTube videos in your blog, or telling podcast listeners to join your email list. If you are creating value on other platforms, make sure those platforms are talking to each other in some way so you can maximize the number of people who will find your course.
Online course mistake #6: Trying to do it all yourself
Whether it’s building, promoting, and managing online courses, or making a four-course dinner, trying to do everything yourself is a recipe for burnout and bad outcomes for your students. This is especially true if you have more than one course, or if your course isn’t the only product or service you offer.
In AskPat Session #1021, I coach Guy Hauptman, a science teacher who has built several different online courses on several different websites and hosting accounts and needs help managing them all.
Online course mistake #7: Focusing on design rather than user experience
When we were setting up the sales page for Smart From Scratch using Teachable, we tried to customize it so it would match the rest of the pages on SmartPassiveIncome.com, with the same stylings and fonts. We wanted to replicate the look and feel of the rest of the site so students would have a seamless brand experience, but through that process, we ended up breaking a number of things on the sales page that were really important.
For example, one of the things in Teachable that people love is the fact that it tracks your progress as you finish each lesson. But, because of our sales page tinkerings, that function was broken for the first three Smart From Scratch launches, including the beta launch.
Oops.
So we decided to scrap all of the changes and revert back to the standard Teachable code base, and take advantage of their built-in customization options. It was a bit more limited aesthetically, but it worked out much better in terms of user experience.
Are you a talented web developer or designer? Maybe you could create your own course interface, or tinker with the code on your course platform . . . but should you? Especially when you’re just getting started building your first course, stick with the foundational elements. Put yourself in your students’ mindset: They’re not going to care that your course has the most beautiful interface design if the navigation is clumsy or they get a browser error every time they click the Continue button.
Thankfully, these days there are some great online courses software solutions for online course creation that provide an excellent user experience “out of the box,” and the one I recommend is Teachable [affiliate link].
(Also see above, “trying to do it all yourself.”)
Online course mistake #8: Not pricing your course appropriately
There are no set rules when it comes to pricing your course, but you can still go wrong if you end up with a price point that’s too high or too low. Too high, and no one will buy. Too low, and you’ll be limiting your income opportunity—and potentially ending up with fewer sales. Why? Because the perceived value of your course will be lower, which can be a signal to some people that it’s not worth spending the money on. It’s counterintuitive, but definitely a real phenomenon.
So how do you get the price right? Two things can be helpful here. The first is competitive research. What are similar courses going for, and how do they compare in terms of value to yours? The second is (surprise, surprise) your beta group! Their feedback on how much the course is worth will be invaluable in setting your final price. In fact, for Smart From Scratch, I increased the price from $197 to $247 before the public launch, due to feedback from beta students who thought we were underselling the course, and because I wanted to offer more perceived value.
If you ever want to adjust the price of your course after it’s been publicly launched, you need to have clear reasons for doing so (i.e., you’ve added more value to the course), and to communicate those reasons clearly to your audience.
Online course mistake #9: Having poor-quality content
This one should be self-explanatory, but if your course content is poor quality, you’re going to end up with unhappy students. It’s okay if your beta course content isn’t as clean as the final version, but there needs to be a base level of quality. If you get feedback from your beta students that the course text is riddled with typos and hard to follow, or the audio downloads are scratchy and hard to hear, then you want to make sure to fix those things ASAP.
Online course mistake #10: Not having the right amount of content
A great course is about balance. Give people just enough content to learn what they need to, but not too much that they get overwhelmed, or too little to adequately achieve the promised transformation. You also need to make sure that the content is aimed at the right level of difficulty or complexity for the target audience and intended transformation. Once again, your beta students are going to be your saving grace here!
Online course mistake #11: Not playing to your strengths
Are you a natural in front of the camera? Then use that to full advantage when creating your course content. But what if you’re not? I think video should be your primary form of content in your course, because it’s such a powerful way to connect with people and share information, and I strongly encourage you to use video as much as you can in your course.
But what if you’re not a video natural? Here are a few tips you can use to get better and more comfortable recording your course videos:
- You don’t have to have your face in front of the camera. You can record what’s on your computer screen and teach via a slideshow presentation instead. This is a common approach, and a great way to share information. Use tools like ScreenFlow (for Mac) or Camtasia (for PC) to screen-record your computer and your voice for your lessons. You can also use QuickTime Player if you’re on a budget!
- For each lesson, know that you don’t have to record perfectly all in one take. Hit record on your camera (a phone is okay, too—you don’t need the best, most expensive camera), and film everything until the lesson is over. It’s going to be long, and you’re going to mess up, but don’t start over from the beginning each time; just start from the last part before you made your mistake. When you edit, it’s like magic. Just remove those mess-ups, squish the good parts together, and boom! A fine-tuned, well-put-together video. It’s okay if there are jumps between parts—that’s called a jump-cut style video, and it’s actually very popular, easy to engage with, and easier to film!
- Most of all, practice. Your first video is going to be your worst video, and your second one will be better than that one. You have to be the disaster before you become the master, so as long as what you’re teaching makes sense and helps people, you don’t have to be super polished or professional.
Also, remember that your videos don’t have to be perfect, even after you’ve edited them. If you think your videos are bad because you say “um” and “uh” here and there, well, let me put your mind to rest. Nobody expects perfection, and little mistakes are what make you human. (Unless you’re actually a robot, which is cool too.)
Of course, video isn’t the only form of content you can use in your course. If you’re a great writer, then put that skill to its best use in creating your course content. Are you a whiz at animation? You get where I’m going!
Brainstorm your next online course.
Download your FREE Online Course Creation Template, a workbook to help you refine your ideas and create a concise course outline.
Examples of successful online courses (and how they were started)
In this section, I’ll be sharing a few stories of entrepreneurs in a range of fields who have used an online course to grow their audience and their income, and deliver a positive transformation to their students—and themselves. I decided to highlight a pretty broad range of case studies, so that you’ll hopefully find something to identify with and be inspired by in these course creators’ stories. You’re going to see how it’s possible to succeed with an online course even if you already have a full-time job, or your niche is not that mainstream, or you’re starting from scratch (or maybe all of the above!).
Here are the case studies we’ll be featuring:
- Building something big in an obscure field: Deborah Niemann
- Creating a family business around their course: Sam and Joe Pitcher
- Following the course validation process to a T: Bryan Harris
- Overcoming impostor syndrome (& winning with Crowdfunding): Asad Chaudhry
- Finding Course Success Alongside Life and a Job: Dave Stuart Jr.
Building something big in an obscure field: Deborah Niemann
I first met Deborah Niemann at the Podcast Movement conference in 2019, and to be honest, I was a little shy about asking her to join me on the Smart Passive Income Podcast in early 2020. Deborah has become kind of a celebrity in the online course world—and for good reason!
She’s been incredibly successful creating and selling courses in her niche: goat breeding. Over the past three years, she’s launched several successful courses and created a tiered membership program. Over 5,000 people have gone through her courses to date, and nearly 80 percent of her income comes from courses.
So how did Deborah get to be so successful in this niche?
Moving to the country
Deborah moved to the country in 2002 to grow her own organic food. She also loved goat cheese—but not how expensive it was—so she thought, “I’m just going to get a couple of goats so I can make my own goat cheese.”
And she did. But after a couple of years, her goats started dying. They weren’t getting pregnant, or staying pregnant, and she didn’t know why. She took them to four or five different vets, none of whom knew why, either. So she started doing research, and figured out that the main problem was that the goats were copper deficient.
In the meantime, Deborah “was also doing all this other homesteading stuff, like gardening, and chickens, and making soap, and making cheese. And people were asking me in the real world to teach them.”
Deborah started out teaching people one-on-one in her kitchen, but soon realized it made more sense to teach to groups. So she started teaching up to eight people at a time. Then she started getting phone calls from people who said, “Hey, so-and-so told me that you taught her how to make cheese, or how to make soap. Could you speak at this conference?”
That progressed all the way to a speaking engagement at the first Mother Earth News Fair in 2010, in Pennsylvania. There, a publisher discovered Deborah and sold her on the idea of writing books. She agreed, and wrote several books on raising goats and self-reliant living.
Even though her books ended up being successful, they weren’t making her much money. So she started teaching online for the University of Massachusetts. It paid just a little more than her book royalties. But it did give her the spark of an idea: that she could start teaching what she knew about raising goats via online classes.
From missteps to first online course
Initially, Deborah thought she could just take the content of her online university course and change the format for a different audience. She had almost finished the course when she began comparing it to other courses out there—and realized it wasn’t going to work. The course she’d made based on her university teaching ”involved a lot of research, a lot of assignments. And that is not what the online public course space is like.”
So she threw out that plan and had her son follow her around with an iPad and video record everything for an “on-farm” course. But that didn’t work either, because the sound quality wasn’t good enough.
Then she found an online course about how to create your own course on Teachable, and the rest, as she puts it, “is history.”
She initially worried that setting up her first course in Teachable was going to be difficult, but quickly realized “that it really wasn’t that complicated,” and that Teachable was a really intuitive platform. Although she signed up for Teachable’s paid plan, which came with two free hours of concierge onboarding, she never needed the extra help.
Her first course in Teachable was called Goats 101. She recorded the content (about seven hours of video), priced it at $129, then offered the course at half price to the 2,000 people on her email list. Fifty people bought the course, which validated the idea. She got a bunch of positive feedback, nobody asked for a refund, and Deborah was on her way.
Growing her list and expanding her platform
Deborah’s next action item was growing her email list. She thought about offering a free course to get people into her funnel, but she was stuck on what topic to use.
Luckily, she came across some advice to look at her blog stats and see which posts get a lot of traffic, shares, and engagement when shared on social media. She saw that her posts on copper deficiency in goats “would just blow up every time,” so she created a free course on copper deficiency—and immediately got hundreds of sign-ups.
“I was just blown away,” says Deborah. “I had it set so that I would get an email every time somebody signed up for a free course. I was getting dinged all day.” Within a couple of weeks, over 1,000 people had joined the course.
Since then, she’s created several more paid courses: Just Kidding and Raising Kids, which is all about birthing and raising baby goats, and a course on soap making. She also has a membership program that includes access to five courses, with a premium tier where people get her cell phone number for texting, plus two monthly Q&As on Zoom.
Marketing her courses using empathy and authority
Marketing can be a struggle for many creators. Even if you find it easy to put a course together, it’s another thing to go out there and have the confidence to sell it. Deborah combined a smart email-based launch strategy with the power of empathy and the authority she’d built up in the goat-breeding community to propel her first paid course to a successful launch.
Deborah didn’t try to do it all on her own when she launched her Goats 101 course; instead, she borrowed the strategy from the “Seed Launch” chapter of Jeff Walker’s book Launch. She emailed her list and asked them, “I’m working on a course; what would be helpful to you?” Then she followed Jeff’s launch formula using a series of emails to promote the course.
In these emails, Deborah spoke directly to the main concerns and motivations of her target audience: people who keep a few goats as pets or because they want their own milk supply. From the early days, Deborah realized there was an opportunity to help these people, as she puts it, “raise their goats without losing their mind or going broke.”
Sounds pretty extreme, but as Deborah explains, when it comes to raising and caring for goats, “there is a ton of conflicting information online.” She gets a lot of emails and messages from people saying, “This is my problem, and I’ve read this online, and I don’t know what to do.”
“That’s the losing your mind part,” Deborah says, because all the conflicting information out there on raising goats can be “very confusing.”
What about the “going broke” part? Deborah says there are so many people online telling others, “‘You ‘have to have’ this ginormous list of drugs, and supplements, and everything to keep your goat alive. And everything your goat does is ‘a symptom that it’s dying.’” Without the right information, goat owners can easily spend lots of money on medicines and supplements that don’t help, or make things worse.
In her Goats 101 launch emails, Deborah tackled the “losing your mind” and “going broke” issues head-on. She talked about her experiences as a new goat owner, and how frustrating it was to find conflicting information about raising goats. She also shared how she was lucky enough to find some trustworthy and experienced mentors to guide her.
Says Deborah, “I got the same conflicting information on Yahoo groups eighteen years ago that people are getting on Facebook groups today. And so, I put a lot of information in there so that they know that I’m empathizing, I know where they’re coming from. And talk about some of our birth stories. Our first birth stories were hilarious, because we really had no idea what we were doing.”
In addition to empathizing with her audience, Deborah has been able to position herself as an authority in a space where so many people are confused by conflicting information. How does she cut through the noise and confusion to stand out as a trusted figure?
“I tend to quote a lot of expert sources. I have every vet textbook that’s ever been published in the last fifteen or twenty years, for goats. And so, instead of just saying, ‘This is what worked for us,’ I actually quote the research. And I also, since I teach college, I have access to the library’s subscriptions to scholarly journals. And so, I talk about the research.”
This is one of the things people tell Deborah they appreciate about her: She’s not just telling them, “Do this because it worked for me,” but, “because I read all of the research, and the research led me to do this.”
Deborah’s number one tip for course creators
What does Deborah recommend for somebody who wants to follow in her footsteps?
“As soon as you have a website, start collecting email addresses.” Her website was collecting roughly 30,000 visits a month for five years, but she wasn’t collecting email addresses. Thankfully, she had access to the 2,000 email addresses she used to promote her first course through a network she’d created on a site called Ning.com.
Once she set up her email list via ConvertKit and started collecting addresses on her site, she “could believe how fast people signed up.” Roughly 500 people signed up within a few weeks.
She also wishes she’d started a podcast sooner. Of the roughly 450 articles on her website, 125 are about goats. Deborah feels like she’s “pretty much written almost everything there is to write about goats.” As a result, she has trouble coming up with new goat-related article ideas. But she found that having a podcast “opened up a whole new world to me, and a whole bunch of new people. There are people out there in the podcast world who were just waiting for a goat podcast.”
Creating a family business around their course: Sam and Joe Pitcher
Sam and Joe Pitcher created a course to help their mom, Sue, (actually “mum” because they’re British :D) share her approach to textile artistry with others. I asked them to answer a few questions about how their course came to be and how it’s changed their lives and their business, and they were game to help out! They shared a ton of detail with me on how creating their online course helped them figure out who their audience actually was, so they could bring Sue’s passion and skill to the people who could benefit from it. Check it out!
1. What is your course, who is it for, and what transformation does it help people achieve?
Our signature course is called Exploring Texture & Pattern. My brother Sam and I developed this course with our mum, Sue Stone, who is a respected textile artist and tutor. She’s been Chair of the most prolific textile art organization in the UK and had her work featured in top embroidery magazines such as Selvedge and Fiber Art Now. She also travels the world teaching in-person stitch workshops to textile enthusiasts. This course was a way to take her teaching online and be able to go more in-depth than she was able to in an in-person scenario.
The world of fiber art is filled with passionate, creative people who are compelled to make stitched works of art, but a common issue is what we call “dabbling.” There is a temptation to try out as many shiny new techniques as possible, and often stitchers find themselves flitting from one thing to the next. One week they are in love with appliqué; the next they’ve moved onto screen printing. This can be great fun, but what we’ve found over the years from community members is that it ultimately leads to frustration, feeling overwhelmed by the possibilities and dissatisfaction with their process and the work they create.
Our course offers an alternative because we take the focus away from complex embroidery techniques and instead home in on creative thinking. Mum challenges students to “opt for a set menu of techniques rather than the ‘all-you-can-eat’ buffet.” But by choosing just a handful of simple, traditional stitches, she encourages students to push their boundaries by asking What if? and honing the potential of these techniques. It’s a “go deep rather than broad” approach to making textile art.
The beauty of this approach is that a beginner can get a lot from the course because it doesn’t require advanced technical skills, but it also gives more experienced stitchers a new way of looking at the creative process. It also encourages the students to work to their own tastes and explore how they can use the techniques to develop their own personal visual vocabulary—it is not a follow-along, connect-the-dots course. Each student produces work that is individual to them. That is one of the aspects that differentiates our course from some of the other online embroidery classes, which tend to be more prescriptive.
Our community is mainly made up of women over the age of fifty, most of whom are used to attending in-person textile art workshops. Many of them haven’t been creative in a long time and are returning to embroidery after a long break having raised a family or worked full time. We made this course for them, to offer them a creative outlet, as well as a way of building a more systematic approach to their stitch process and create work that they’re proud of in their own voice.
2. Why did you create your course?
We created the course because we knew Mum’s passion for her craft could reach more people than if she stuck purely to in-person workshops. She’s also not far off seventy years old and doesn’t want to travel quite as much going forward.
We were also very keen to make something as a family. Of course there are times when working with siblings and parents can be challenging, but in general it’s fantastic to be building something together.
But primarily we made the course to serve the needs of our community. We spent a long time building the blog, newsletter, and social media presence before we ever tried to sell anything of significance (too long, in fact!). We knew if we wanted to build something sustainable for us and for the community we’d need to create something to really address the feedback we were getting when we chatted to people in the community.
They wanted the ability to build a more disciplined creative process and use the materials and stitch techniques they loved and grew up with (many of them learned to sew sitting on their mother’s laps) to create art. They were feeling frustrated that the only way they really felt empowered to make anything was by imitation because they lacked the tools to be able to bring their own vision for a piece of textile art to reality. They had no go-to system for developing textile art that felt personal to them.
There was also demand for the community to learn from our mum specifically. I think the story of Mum’s return to textiles (she didn’t make anything for almost thirty years) resonated with people, and they liked the fact that someone starting later in life could not only achieve as much as she has achieved but also create work that feels very authentic to who they are.
3. What were the biggest challenges you encountered in creating and marketing your course?
Sam and I perpetually underestimated the amount of time various stages of developing the classes and the promotion around the course would take, so when we built the first version we missed every single deadline.
We were originally doing all the work ourselves. I was writing every bit of content, Sam was making every single graphic, we were inputting newsletters and blogs, doing all the social media, building out sales pages, filming and photographing the course ourselves . . . It was a fairly stressful process trying to spin all of those plates. Some of that was to do with the fact we hadn’t made any real money from the business at that point so couldn’t afford to get other people involved. But I think a bigger problem came from us not wanting to relinquish any control. That’s been a difficult learning curve, and one we still struggle with from time to time.
I think the learning curve in promoting the course was also steep. It was a new way of thinking for us. We originally did a Jeff Walker-style video launch, and with each launch we’ve refined the language we use. I think, although it gave us fantastic results, the first time we released the video series we were uncomfortable with the sales pitch side of things. It felt inauthentic to be so direct; it’s taken us some time to find the way we talk about the course to potential students in a way that is confident and demonstrates we have absolute faith in the product but also feels authentic to us and our audience. After all, we’re polite, nicely brought-up English men, neither of whom have any real background in sales. Sometimes the traditional strategies of online selling can feel a little brash to us, so it’s been about adapting those strategies to suit our personalities and the taste of our community members.
Another challenge was the resistance from our community to online learning. Because they are so used to the in-person interaction of workshops and instant feedback, there was a big leap for them to see that online learning could be just as satisfying (in a different way), and in some ways better in terms of detailed teaching.
4. How has the course changed your business and/or life?
Honestly, it has made it into a business. Prior to the release of the first course, we’d tried various things as we figured out who our audience were. And none of them were very successful.
We started out thinking our audience would be professional textile artists like Mum or people aspiring to exhibit and make a living from their art. A lot of our early attempts to make the site into a business were focused around that: teaching people how to promote their work, even offering a service where we built websites for artists.
When we started to learn that our audience didn’t necessarily have those aspirations and were actually people who just loved to stitch and create textile art to satisfy their own creative need, we did a couple of affiliate launches for other online textile art courses. I think the issue there was that those weren’t really viable long-term prospects. Although we had a decent-sized mailing list (probably around 30,000 at the time), it was a struggle trying to convince the artists who ran those courses of the value we could add to their launches, and so we settled on a commission rate that didn’t make the return worth the investment. But I’m glad we did them because they taught us a lot in preparation for launching our own course.
5. What tips would you share with other first-time course creators?
The number one tip is listen to the audience. Get on the phone with some of your most enthusiastic community members and talk to them. That was uncomfortable for us to begin with because we’re both naturally quite introverted and shy, but it was a revelation. It gave us so much invaluable information about who our students were, what they wanted (or thought they wanted) versus what they needed, the obstacles they faced, potential objections they might have, and the language they were using.
Beyond that, don’t get bound by perfectionism. The first version of your course is just that: the first version. Each time you can listen to the feedback and tweak what you have to serve your students, the better.
Don’t be afraid to charge what the product is worth. We struggled initially with the fact that in order to make the business sustainable (and in turn be able to continue serving our community) we needed to make a course that was significantly more expensive than the other online textile art courses available. We knew in order to justify that price tag we had to go above and beyond in the value we offered. And that’s what we did. After several launches, I still get nervous asking people to part with a significant amount of money, but we have very little pushback and a very low refund rate, which I guess shows we’re doing something right!
6. Anything else you think would be useful/interesting to know?
I just want to emphasize the value of really good testimonials. Anything positive that people say about the services you offer, keep it somewhere safe. When it comes time to launch, get on the phone with some of those people and craft testimonials around the claims you’re making about the course. It’s so much more powerful when it comes from people who have experienced the course and don’t stand to gain anything.
Following the course validation process to a t: Bryan Harris
I had the pleasure of interviewing Bryan Harris of Growth Tools (formerly Video Fruit) in Session #190 of the SPI Podcast. He always shares amazingly helpful content, and the awesome thing about Bryan is that he’s used a version of the validation method I talk about above to pre-sell several different kinds of products over the years to make sure people want those products first before he builds them. In this section, I want to highlight the launch of his very first product, a course called the Bootstrapper’s Guide to Explainer Videos.
Bryan started his entire business with the Bootstrapper’s Guide from scratch inside a small Facebook group in 2013. Five months later, he quit his job. Here’s how he did it…
[Note: This case study is lightly adapted from my book Will It Fly?.]
Step 1: Get in front of an audience.
Bryan has some serious video-making skills—that’s one of his superpowers. After getting great feedback on his work, he decided to see if he could create a business out of it. He started to build a rapport with the members of a small Facebook group that he knew would be potentially interested in making videos. He began sharing a ton of advice and opening up a lot of his video-making process for free, and in doing so he was allowing people to get to know him and his expertise first, which I love. If there’s one thing that will always work for building a strong relationship with an audience quickly, it’s providing value first.
Step 2: Hyper-target.
After a week and several helpful posts later, Bryan shared the following message publicly in the Facebook group:
Last draft of first video using a new method (see post from yday). Final copy out tomorrow. Total hard cost of this video is under $30 with around 2.5 hours of my own time invested.
If you are interested in learning how to make these DM me your email address.
The post also included a short video that people could play to watch to see his work in action. What’s cool about this post is that he’s not just sharing his progress, but he’s also hyper-
targeting those in the group who are interested in learning more about his video making methods. Twenty-five people ended up “raising their hands” and sending him a direct message with their email address, and this is when his idea for the Bootstrapper’s Guide to Explainer Videos course was born.
Step 3: Share your solution.
Next, Bryan sent the following email to everyone who had sent him a message:
Hey guys,
If you are getting this email you asked me to contact you with some details on how to make the cool promo videos that I posted . . .
So here’s the deal:
Last week I found this really cool way to make awesome videos. I’ve used it myself over the last week to make several product videos and have even made sales to clients for those videos, all at a very high markup.
I want to make a course showing every detail of how I do it, but I want to pre-sell the course to verify demand . . .
I love that Bryan is being super clear and honest about what he wants to do, including the fact that he’s going to pre-sell his product to make sure there’s a demand.
Step 4: Ask for the transaction.
Bryan includes a call-to-action in the remaining part of that same email:
I have stood up a simple web page here where you can pre-order. The regular cost is $55 but the pre-order price is just $35 . . .
I am offering everyone that gets this email a 25% discount off the already reduced pre-sale price. Just use the offer code “earlybird” at checkout. That will make your total $25.75.
He set up a quick pre-order page, and his goal was to get three people out of the twenty-five (12 percent) to pre-order the course to show him that there was legitimate interest and people weren’t just being nice. Within forty-eight hours, nineteen of the twenty-five prospects had purchased, validating his idea for the course. Yes, this was a massive discount relative to what he was actually offering, but his goal here wasn’t to make money; it was to simply validate the idea by having people pay something.
What happened next?
In good form, Bryan kept in constant contact with his customers while building his course between May 2013 and October 2013. He also continued to post regular updates about the course in the same Facebook group, and he started to build an email list. By October, his list grew to 575 people and he was ready to re-launch his course. He re-evaluated the value and pricing structure of his program based on the feedback from his current customers, and when he re-launched his course with a price point of $397, twenty-one people purchased, generating a total of $8,337 in revenue. And by then, his course was already complete.
He also discovered that a lot of people wanted to just pay him to create videos for them, so he took on a number of clients at the same time, many coming from the same Facebook group. It was at that point he was confident enough to make the decision to quit his job and go full-time with his website and services at VideoFruit.com.
And to think, this all started from just providing value in a small Facebook group. Awesome. Check out my interview with Bryan on the SPI Podcast:
Overcoming impostor syndrome (& winning with crowdfunding): Asad Chaudhry
Asad Chaudhry is a magician, entrepreneur, teacher, YouTuber, and vlogger who has turned his passion for close-up magic into a successful course-driven business. He’s become one of the leading magic educators in the world, but getting there has meant leaving behind a stable engineering career and overcoming self-doubt.
1. What is your course about, who is it for, and what transformation does it help people achieve?
My flagship course is entitled The Foundations of Card Magic, and it aims to help students of magic gain a firm grasp on the fundamentals of the craft. Learning magic tricks can be an incredibly enjoyable and useful hobby for those seeking to develop a skill that helps better connect with others and entertain. Learning a tangible new skill can also be a powerful confidence-building and therapeutic process for the individual.
2. Why did you create your course?
I had been creating free magic tutorials on YouTube for quite a while and built a strong subscriber base. It became apparent that my audience would benefit from a more comprehensive and structured learning resource that would help students learn the material step-by-step in the ideal order. I was also interested in monetizing my audience so that I could create a business and pursue my interest in magic full-time.
3. What were the biggest challenges you encountered in creating and marketing your course?
This course was my first product, so there was a great deal of uncertainty when it came to releasing it. I had published so much free content at this point that I was unsure of how selling a course would be received and how it would affect the perception of my brand. Instead of investing countless hours ahead of time to create the course, I felt it would be safer to validate the idea first by launching a crowdfunding campaign through Kickstarter to see how much demand there would be.
4. How has the course changed your business and/or your life?
The Foundations of Card Magic Kickstarter campaign greatly surpassed my hopes when almost 2,000 backers helped raised over $65,000 to support the creation of the course. This revenue helped me leave my full-time job as an electrical engineer and pursue my goal of working for myself and creating a magic company with confidence. The course became the first in a line of successful entrepreneurial ventures I have launched since then, and I have been able to develop a lifestyle with much more freedom and independence than what I once had.
5. What tips would you share with other first-time course creators?
It seems like first-time course creators often experience a degree of impostor syndrome. They question whether they are in a credible position to create a course and ask themselves, “Who am I to teach others?” It’s important to recognize that these are completely normal thoughts and that all experts on a subject have the same doubts from time to time. Remind yourself that as long as you know more than your students, you are in a good position to provide them the value they are seeking.
6. Anything else you think would be useful/interesting to know?
A unique and beautiful aspect of an online course is that it’s a product that you can gradually improve over time. My recommendation to first-time course creators is to create a minimally viable version of their course in the beginning, and then continue to add to it after receiving feedback from the first batch of students. This will help you to validate your course idea before investing too much time into it, and it will cater the content to your target audience more precisely.
Finding course success alongside life and a job: Dave Stuart Jr.
Dave Stuart Jr. is a teacher with a full-time job and a family—and he still found time to create his own products and spend more time with his family. He created his first course in 2016, and since then he’s created three additional courses and even speaks and leads workshops for teachers around the world. He’s a real inspiration in terms of what’s possible for busy course creators everywhere. Here’s a little Q&A I did with Dave on how he succeeded with his first course and how it’s changed his life and his business.
1. What is your course, who is it for, and what transformation does it help people achieve?
The Student Motivation Course is for K–16 teachers seeking to win the hearts of their students. It helps teachers understand and implement the five key beliefs beneath motivated human action: credibility, value, belonging, effort, and efficacy.
2. Why did you create your course?
I was noticing in my high school classroom that a growing percentage of my students came to me disinterested in school. And as a teacher who also writes and leads trainings for teachers around the world, I was aggressively poring through the research on human motivation. I started seeing these same five themes again and again—the five key beliefs. And so I began incorporating these into my classroom and my trainings, and I found that they really helped clarify student motivation—both how to analyze when students are under-motivated and how to act in a positive way to remedy that lack of motivation.
3. What were the biggest challenges you encountered in creating and marketing your course?
I decided to opt for brief mini-lessons—anywhere from two to ten minutes in length—with attached “Dig Deeper” links (studies, articles, books) and a “Reflection Application” exercise. The difficulty was in scheduling the time for myself in my classroom to film the lessons because it was obviously easier to film them in batches. But my classroom is active with students for five hours per day, and during other hours it’s prone to unscheduled visitors (students, colleagues). I did eventually find a rhythm that worked, and filming the course took about a month total.
Marketing the course was really straightforward: When I’d have an insight into student motivation while I was filming the course, I’d write a blog article on that insight and mention the course waitlist at the end. By the time I was ready to launch the course, there were 800 people on the waitlist (down from a 17,000-person newsletter list).
4. How has the course changed your business and/or your life?
My revenue used to predominantly come from in-person speaking and workshops, but now the largest slice of the pie is from digital courses—and this course is by far the breadwinner. It has also been a surprising source of marketing power, as I’ve had numerous participants end up asking me to come to their school to lead a workshop. These after-course workshops tend to be the best reviewed of all my offerings, too—because by the time they’ve completed my course they are very familiar with my down-to-earth style as a speaker.
Most importantly, I’ve heard from many teachers who share that this course has genuinely helped them reach more students. My blog has always existed to encourage and equip educators on the journey to long-term flourishing and professional excellence—and it’s rewarding to know that, even as I write this, a course I created may be helping a colleague across the world to make progress on that exact journey.
5. What tips would you share with other first-time course creators?
Do the research. I think the reason my course appeals to teachers is because I am able to cite where my insights originate and explain how I’m moving from research to theory to practice and back again. As I model this through the brief lessons, my participants grow in their thinking and skill, and they end up feeling a greater sense of agency when confronted with previously unsolvable problems. There’s really not a shortcut (in my opinion) to developing the kind of expertise that can really help someone. So keep doing the research and the thinking and the clarifying and the writing that factor into giving you unique insights.
Don’t get lost in minutiae. My course videos are all made in iMovie, and they are not edited into neat clips or anything like that. I put in a simple iMovie intro, I optimize the audio (with what little functionality for this that iMovie offers), and I put in an outro. Very simple. In some industries I think this makes sense to up the production value—e.g., courses for online marketers where the design and quality bar are higher—but even then, when I look at the video-based courses that Seth Godin creates, the production value isn’t high. Rather, it’s the words that Seth produces, the ideas he’s worked so hard to develop. So I guess I’m just looping back to that first tip: Don’t try to skip the hard work of developing the great ideas and solid insights that come from a deep familiarity with the playing field of your industry.
Create your own online course success case study
I hope these case studies have shown you that there are many ways to be a course creator and further inspired you about what might be possible!
Online courses, as you know, have been a big part of my life over the past three years, and an increasingly bigger and important part of the SPI Media brand. In fact, courses have become the number one way we’ve been able to help entrepreneurs find and build their audiences and grow their income.
I remember when I first started even hearing about online courses. I was focused mainly on affiliate marketing at the time (don’t get me wrong—affiliate marketing is great!), and even though lots of people were nudging me to build a course, I was always pushing back.
Why? I didn’t think I was good enough to create my own online course.
I’m so glad I pushed through that sabotaging belief.
The truth is, to succeed with an online course, you don’t have to be the expert, and you don’t have to be the first to market. You just have to create something that resonates with your audience and will help them solve a problem or achieve a desired transformation. You don’t have to be the world’s foremost authority—even if you’re just a few steps ahead of your target audience, you have an ability to help them—and get paid for it!
Yes, it is a lot of work to create and validate an online course. But the work you do up front can pay you back in spades over time.
My recommended online course creation platform (Where to host your online course)
By this point, you’ve come so far and learned a lot about online courses, and I want to stop and congratulate you for your commitment to creating and launching your online course the smart way!
You’ve had a chance to dig into:
- What an online course is, and why it can be so valuable to your audience and your business
- How to overcome common objections to creating and launching your own online course
- Everything that goes into creating your online course
- How to start marketing and selling your online course
- Tips to help you succeed with your course
- The biggest mistakes to avoid during the course creation process
- Stories of successful course creators to inspire you about what’s possible
And remember, this guide is a free resource that will be here for you whenever you need it during your course creation journey.
It’s not an overstatement that offering online courses to the SPI audience revolutionized our business a few years ago. And that was possible thanks to Teachable. It’s the market leader in the online courses industry, and for good reason.
In this section, I want to share the main reasons why we at SPI love Teachable, and why I recommend you use it as the platform for your online course.
[Full Disclosure: I’m a compensated advisor and an affiliate for Teachable, and this guide contains affiliate links.]
The reasons I love Teachable
It’s easy to use: A large reason we host all of our online courses on Teachable is because it’s so darn simple to configure content, manage settings, and sell your course. There’s no coding required to set up and start selling your online course. Teachable makes it very easy to just “plug and play.”
When it comes to content, Teachable makes it especially easy to create high-quality course materials from scratch. You can take videos, audio files, text, PDFs, and worksheets and just literally drag and drop them into your course to build your curriculum. Every Teachable plan includes unlimited video and course content bandwidth, so you can upload as many courses, videos, and PDFs as you like.
Here’s a screenshot of the Teachable interface from a lesson in my Power-Up Podcasting®️ course. The navigation area is on the left, while all the content (including text, video, audio, and options to download) is on the right.
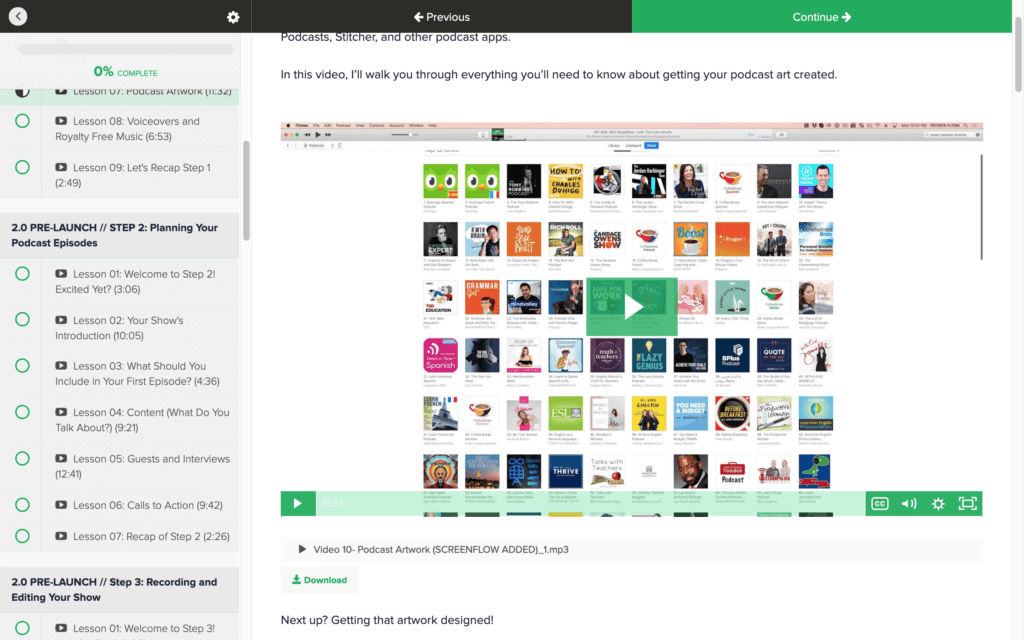
Awesome data and analytics: Teachable is amazing when it comes to data and analytics. It includes a comprehensive dashboard that gives you a snapshot of student signups and revenue across a defined time period. You can get insights across the entire course on metrics like average lecture completion rate, and sort by student account type (free, full price, or discounted). You can determine how students are progressing through the course, which is incredibly helpful in identifying which ones need to be “reignited” to keep going. You can also export your student contact list or course revenue data to perform deeper analysis. Teachable even lets you segment your student list so you can better analyze your stats and send targeted emails based on enrollment, completion, code redemption, and other filters. And it integrates with a large number of email service providers, including our favorite, ConvertKit [affiliate link].
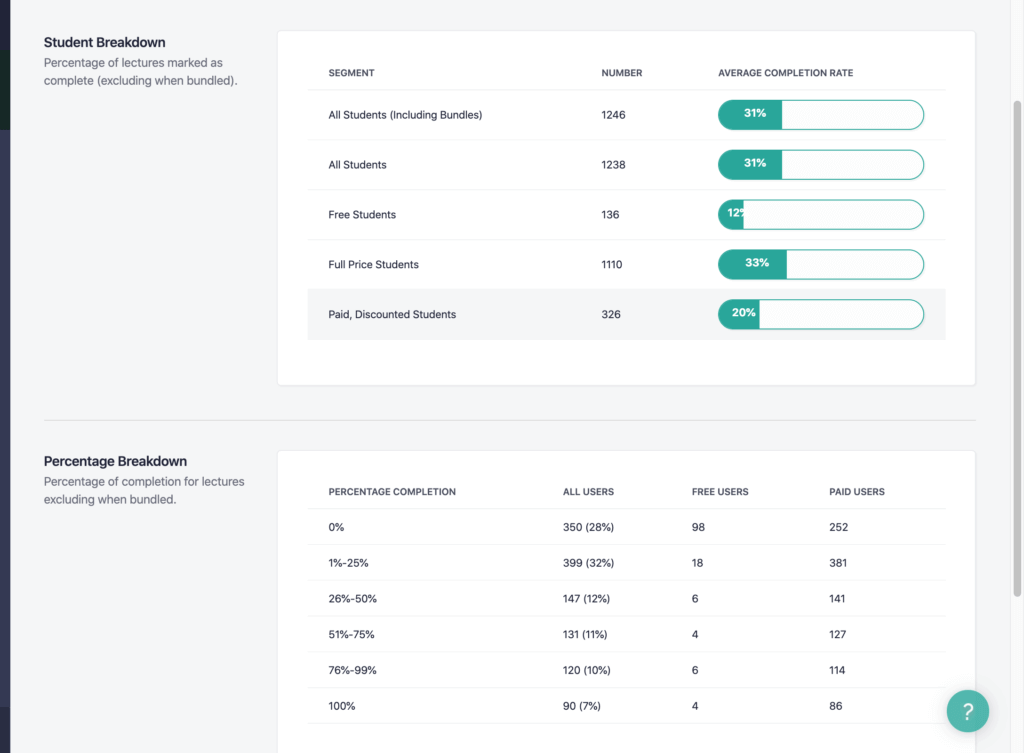
Speaking of deeper analysis, Teachable the company has crunched a ton of data across all the courses they host and the course creators they’ve worked with to come up with some amazing insights. They’ve learned things like the more you charge for your course, the less likely people are to ask for a refund. Or that you’re better off with a four- to ten-day launch window for your new course rather than leaving it open indefinitely after launch.
These are some of the helpful factoids I learned from Ankur, the CEO of Teachable, in episode 218 of the SPI Podcast.
Easy engagement: Teachable makes it easy to keep students engaged and progressing in your course. You can create quizzes to reinforce learning, summarize essential information, and check in on students’ progress. Custom certificates of completion let you reward your students and verify their success. You can even require students to complete each lecture, watch each video, or pass a quiz to make sure they’re learning the material before moving on . You can also add Google Forms, surveys, and other tools to collect information and feedback from your students that helps you understand and serve them better.
Supports your business growth: When you’re ready to add another course to your offerings, Teachable will grow with you. In fact, you can have unlimited courses on Teachable. This makes it easy for students to stay with you, and to cross-promote your courses. You can even bundle courses for sale, so that you can collect one payment for multiple courses. There’s also an affiliate program that lets you reward others for sharing your course.
Flexible options for pricing, payment, and promotion: Teachable is super flexible when it comes to pricing your course, promoting it, and getting paid.
You can set up the following course pricing:
- Free
- Single payment
- Set number of installments (like 3 x $299)
- Subscription model, with an ongoing monthly payment
You can offer all four at the same time. You can also manually enroll students in new courses when necessary, and process full or partial refunds for up to thirty days after enrollment.
When it comes to marketing and promotion, Teachable provides a conversion-optimized sales page template, or you can create your own custom landing pages. You can set up coupon codes for all of the pricing models (except free) and incentivize enrollments by creating dollar-amount or percentage-off coupons with custom expiration times. You have access to advanced pricing options, including charging a one-time fee, selling a subscription, setting up a payment plan, or offering individual or bundled courses. Teachable lets you accept payments from more than 130 international currencies through Stripe Connect credit card processing or PayPal. (You can even accept multiple currencies for a single course!)
Integration and attribution options: Teachable connects with just about any tool out there to help you with your marketing, analytics, attribution, and customer support. Marketing integrations include MailChimp, AWeber, Infusionsoft, Mixpanel, and almost any other marketing tool via Zapier. You can also integrate with Zapier to send custom course-related events from Teachable to virtually any analytics tool, and to connect your school with a support tool like Intercom, Olark, or Zendesk.
Meanwhile, Teachable’s attribution capabilities help you track the effectiveness of your marketing efforts. Teachable lets you add conversion pixels to your site to gain insights about your advertising’s effectiveness. It also provides first- and last-touch attribution, which lets you determine the initial source where a student heard about you and identify which campaign converted them into customers.
Video hosting: This is a less obvious benefit but an important one with big cost-saving benefits. With Teachable, you don’t have to figure out where to host all your video content—and those video files can get big, fast. When you upload your videos through Teachable, you’re hosting it on Teachable’s hosting plan (which uses Wistia). You’re not paying any extra for videos, or worrying about running out of space. Plus, the videos are secure, and only accessible when people log in. Teachable gives you the ability to upload video captions in multiple languages, making it easy to make your videos accessible.
Here are some of the other reasons we love Teachable:
Multiple-instructor support. Allow others to author and manage courses on your school and pay your instructors on a monthly basis.
Flexible hosting and responsive design. Host your course on your existing website or create new pages on Teachable, using the drag-and-drop builder. Setting up hosting is easy; our Teachable school is hosted at courses.smartpassiveincome.com. All of the content management is done inside of Teachable, but on the outside, it looks like an extension of our website. And your course site is fully responsive, so students can view your content from computers, tablets, and smartphones.
Here’s what a lesson page from my Build Your Own Brand®️ course looks like on the iPhone.

Great customer support: The Teachable Customer Care team is available to assist all its users via email, and via live chat if you have a Professional plan or higher. They’re even award-winning! And the Teachable Knowledge Base is really comprehensive.
And last but not least . . . The company is amazing: I’ve gotten to know a lot of the team at Teachable really well, and they’re amazing people who are dedicated to making sure that you and your students have the best experience. Seeing their commitment to helping both course creators and students has been really inspiring.
I believe in the Teachable platform and the amazing team at Teachable so much that I’m not only an affiliate for the company, but an advisor as well. To learn more about the different plans available for course creators and sign up to start creating your course, go to smartpassiveincome.com/teachable.
The team at Teachable has created an incredible platform that allows anyone to create and sell online courses, with no technical experience required and no contracts, setup fees, or cancellation fees. So give it a try by going to smartpassiveincome.com/teachable!

Get superfans secrets in just 5 minutes, for free
Our weekly newsletter helps online entrepreneurs break through mental blocks, blind spots, and skill gaps. It’s the best 5-minute read you’ll find in your inbox.
Free newsletter. Unsubscribe anytime.
Join 100k+
Subscribers