Finding your people is essential for survival
Starting your own business is relatively easy. Keeping it going, and growing, is very hard. Most don’t make it. Put the odds in your favor — surround yourself with a community of peers and experts where everyone is committed to success.
10k+
Posts & Comments
1.2k+
Active Members
18
Premium Courses
100+
Private Events
Our community includes everything you need to create your own path to success.

Private Network
Peers in the trenches with you. Legit experts who have your back. Our team by your side at every step. That’s our private network.

Exclusive Experiences
We facilitate a range of interactive experiences for our members, helping you solve problems and forge valuable connections.

Courses and Accelerators
Our catalog of 18+ premium courses is at your fingertips anytime. We also run regular learning cohorts to accelerate your skill development.
Community is critical
to becoming successful
Starting your own thing is sweet! A side hustle. Small business. Creative project. Whatever it is, working for yourself feels great. It’s also usually stressful. It can be lonely, tiring, and — frankly — a lot. Burnout. Self-doubt. Confusion. Those feelings (and more!) are very common. And they risk stopping you in your tracks. Let’s not do that.
That’s why community is so critical: it’s a safe space to get the support you need when you need it. We all know that we’re the average of the people we surround ourselves with the most. If you surround yourself with a brain trust of like-minded peers and legit experts who share your values and purpose, then you stand a far greater chance of rising above the suck and achieving success.
Our community exists for that reason: to be the go-to safe haven for online entrepreneurs. We support our members at every step of their journeys. Wherever they’re heading, we’re by their side to help them stay focused, work smarter, and become happier and healthier entrepreneurs.
Our members…
unlock their growth potential.
What do you do when you face growth challenges? Our members lean into them knowing that they are in a place where they can access the insights, advice, tools, and other resources they need to unlock their growth potential.
Our members…
gain a trusted network, instantly.
Think of our membership like a fellowship — when you join, you’re in without question or judgment. Entrepreneurs are welcome from all walks of life. Diversity and inclusion fuel the trust, safety, and value of our private community.
Our members…
avoid common mistakes and setbacks.
Achieving success is as much about making good choices as avoiding bad ones. Yes, everyone’s path to success is different — still, there are common pitfalls along the way. Don’t risk making avoidable missteps. Tap into our hive mind instead.
Get access to a treasure trove of advice, events, learning, and more!
Gain a brain trust of peers
Our 1,200+ members are actively building their online businesses — not just talking about it — which ensures that everyone has meaningful and relatable questions, ideas, tactics, and experiences to share.

Our members gain elevated focus, confidence, decision-making, and results that matter to them. The same could be true for you. Join us!
Tap into industry experts
Our in-house industry experts provide members fast access to deep experience across a diverse range of business needs. They walk among us in the community, always ready to pitch in and help you.
Sharpen your skills
Advance your skills with our self-paced and cohort-based courses. Our entire catalog is available to our members. And our community-based experiences help you apply what you’ve learned.
Grow with peace of mind
Never feel alone, out of place, or unsafe again. Our community is built and managed to be the safe place for online entrepreneurs to share, connect, learn, and grow in an inclusive environment.
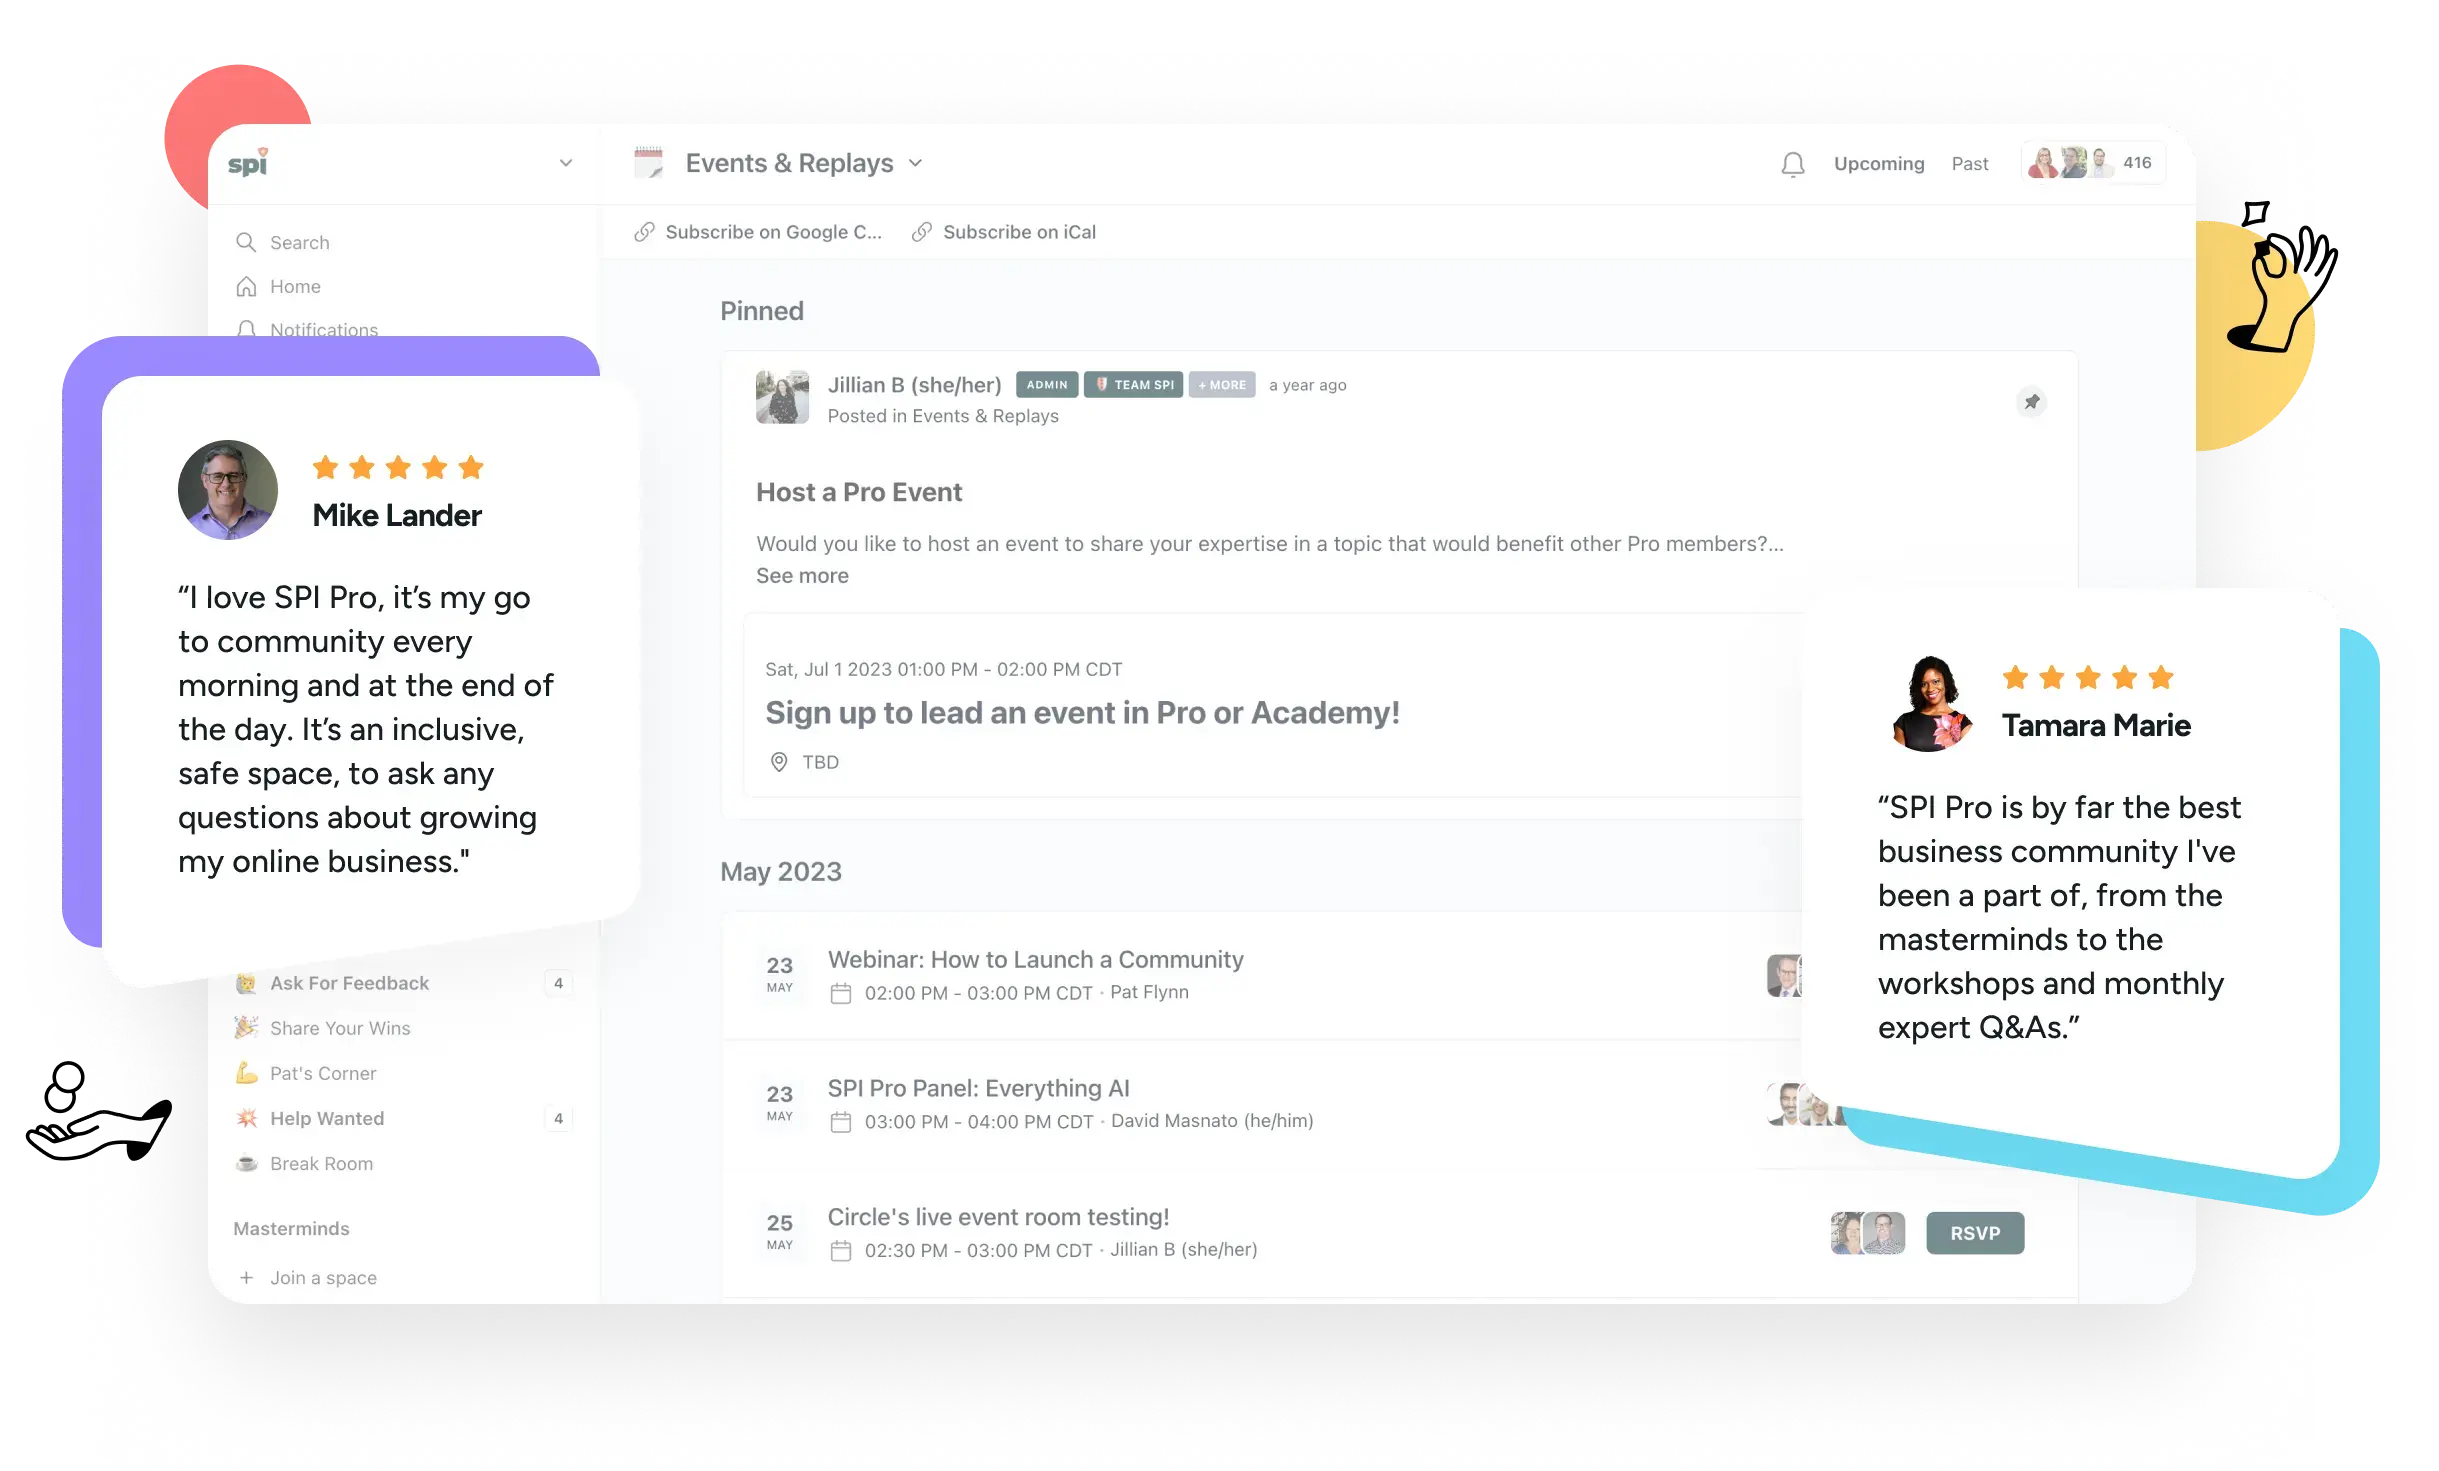
Join interactive events and experiences
Band together with like-minded peers, our team, and our in-house resident experts in a variety of exclusive events and experiences that fuel togetherness, deliberate action, focused work, and much more.
Receive exclusive news and offers
Our members get priority access to our very best stuff. Our best deals. The best offers from partners. Breaking news. First look opportunities. Beta programs. Exclusive tools and resources. And more!
According to our members, our community is their happy place
“The riches are in the niches of the SPI Pro community. My most powerful interactions are definitely within masterminds! SPI did the heavy lifting of bringing the right people together so I could build community around business growth.”

Jette Stubbs
JetteStubbs.com
“The people are what I love most about the community! Everyone is willing to jump in and help and, most importantly, in a nice and caring way. In some other communities I’m a part of, the members talk down to those asking questions. The SPI community is welcoming which promotes more questions and collaboration.”

Jeremy Launder
JeremyLaunder.com
“I like the wide variety of businesses that SPI Pro members run and the depth of experience/breadth of knowledge they have on relevant topics. Other communities tend to focus on building a particular skill set, whereas SPI Pro takes a more rounded approach to the world of starting and scaling a business.”

Trudy Rankin
OnlineBusinessLiftoff.com
“I love logging into Pro because I don’t feel like I’m alone anymore. To see so many other people out there working towards the same thing and supporting each other is amazing. And the community administration is amazing — the checking-in, the answers, the connecting — it’s brilliant. I hope that my community has some of the genie in the bottle that Pro has.”

Ange Wilson
GnomeAngel.com
“The community is a really great group of people. I appreciate everything the team has done to create this space for us.”
—Margaret Campbell
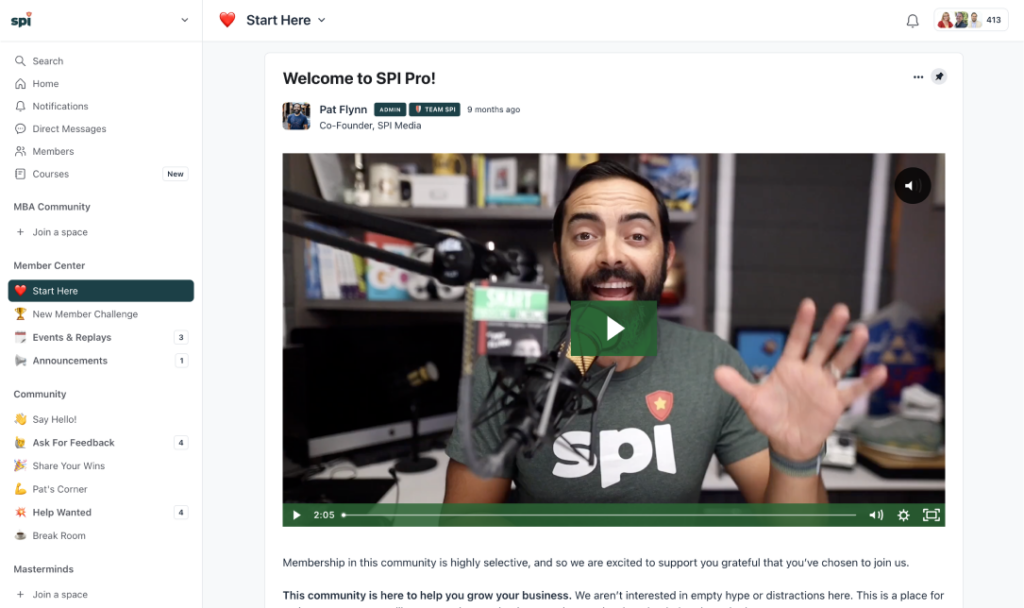
This is where it happens. Inside, you’ll find…
a fellowship of hard-working entrepreneurs and legit industry experts to support you, challenge you, and hold you accountable as you lean into your business and find your own path to success.
Events and workshops, monthly AMAs (Ask Me Anything) talks, peer-to-peer networking and tips, help wanted requests, and opportunities to celebrate your wins — these are just a few of the valuable opportunities you’ll have access to inside our community.
Your people are here waiting to meet you!
Save 16% with Annual billing

For early-stage entrepreneurs
All-Access Pass
$199
/ quarter
$660
/ year
You are in the early days of your business. You’re tired of learning alone. You want to meet other people like you. And you want to avoid common mistakes along the way.
Included with your pass:

Live AMAs
with experts

Guided
accelerators

All courses
($6k+ value)

Network of like-minded peers
“The SPI All-Access Pass has provided me with a fresh perspective on small business and entrepreneurship, opening my eyes to a whole new approach. It’s not just a membership; it has revolutionized my mindset, approach, and strategic thinking. With exclusive courses, live events, and a supportive community of like-minded entrepreneurs, it goes beyond a typical membership.”


Tina Cheesley
For established entrepreneurs
SPI Pro
$299
/ quarter
$999
/ year
You have an online business that’s up, running, and generating revenue. You’ve figured out a lot but are unsure where to focus next. And the growing pains are real.
Everything in the All-Access Pass community, plus:

Vetted network of serious pros

Curated member masterminds
Exclusive access to in-house experts

Strategic guidance & tools
“I love logging into Pro because I don’t feel like I’m alone anymore. To see so many other people out there working towards the same thing and supporting each other is amazing. And the community administration is amazing — the checking-in, the answers, the connecting — it’s brilliant. I hope that my community has some of the genie in the bottle that Pro has.”
Ange Wilson

Not sure which membership is right for you?
or compare both plans so we can help you choose your path.
These kind words from members say it all
Our members are doing incredible things

David Grabowski
|
Stories & Profiles
|

February 22, 2024
A Lifechanging Course Launch through the Power of Community
Steve Huynh wanted to get his first ever course launch right. He wasn’t expecting his life trajectory to be changed in the process.

Kelsey Bressie
|
Stories & Profiles
|
February 22, 2024
A Successful Podcast Launch in Six Months with the All-Access Pass
Amanda Parker wanted to bring her podcast vision to life — with the All-Access Pass it came together in six months.

David Grabowski
|
Stories & Profiles
|
February 22, 2024
Building Wings on the Way Down: An All-Access Pass Success Story
Katy Widrick invested in the All-Access Pass to shift everything about her podcast and find alignment and purpose.

Community is at the heart of everything we do
Hey, hi, hello! We’re Pat and Matt, the two entrepreneurs behind SPI. To us, community is more than a buzzword. It’s our purpose and our business model.
Pat created SPI back in 2009 — this was at the beginning of what we now call the “creator economy.” SPI quickly became one of the best places to learn the ropes of being an online entrepreneur. Since then, SPI has grown to an audience of over 130,000.
Matt joined forces with Pat at the end of 2018. He led the charge to create SPI Pro — our first community, which launched in 2020. To date, we’re proud to serve and support over 1,200 entrepreneurs committed to finding success on their terms.
We’ve lived the journey you’re on now. It’s thrilling. It’s hard. It’s worth it. Keep going. And if you like, let us (with our team and community of peers and experts) help you. We’re in this together.
Got questions? Love that!
Which membership is right for me?
The All-Access Pass is for anyone focused on gaining new skills through courses, whether you’re just getting started or are looking to grow in a specific area of your business.
SPI Pro is where established entrepreneurs come together to take their businesses to the next level.
Can I switch the membership I am in?
To upgrade to the Pro community from the All-Access Pass community, you must fill out an application to join. If approved, you can either wait until your All-Access Pass membership is set to renew and switch at that time, or you can join Pro at the time of acceptance and have an overlap of membership fees.
If a Pro member would like to downgrade to the All-Access Pass community, you may set your Pro membership to cancel instead of renewing. At the end of your membership period, simply purchase an All-Access Pass membership. If a Pro member decides to leave Pro within the first 30 days of membership, we will provide a refund for the Pro membership, per our refund policy.
Do you have a refund policy?
We offer a full refund within the first 30 days for Pro membership, if you decide that membership is not right for you. Due to the nature of the All-Access Pass and the MBA membership (a private add-on for Pro members), all payments for those communities are non-refundable.
Is there an age requirement?
Members must be at least 18 years old to join any of our communities. Participants under 18 years old must have guardian consent to join, and will not have access to Direct Messaging as a general safety precaution. If we discover that an enrolled member is a minor and does not have guardian consent, we reserve the right to close their accounts without notice. If you’re under 18 and would like to purchase a membership, please email us before purchasing at [email protected] so that we can obtain consent from your guardian.
I live outside the United States. Can I join?
Yes! We welcome members from all over the globe into our communities. Our company and staff are U.S.-based, so the times of our events are during typical U.S. work hours.
Does your community offer business coaching?
We do not offer business coaching. We provide strategic programming to help you and bring experts in for high-level guidance, but ultimately our communities are designed for peer connections.
Can I offer coaching in your communities?
No. We do not allow any selling or pitching of services or affiliate programs in our communities. You absolutely should not join if this is your motivation. You will be removed without a refund.
Are there any types of businesses that you do not allow?
All business topics must adhere to our community guidelines. Businesses that read as predatory, ableist, racist, misogynist, homophobic, conspiratorial, overly sexualized, or harmful in any way will not be accepted into our communities. We also do not permit multi-level marketing (MLM) representatives or any business model that involves recruiting downlines.
What are your community guidelines?
Go here to read our complete Community Guidelines and Moderation Policies.
Are your communities inclusive of marginalized people?
We strive to keep our communities welcoming and inclusive of marginalized people as a part of our company and CX (community experience) team values. This will always be a work in progress, and we rely on member feedback to ensure we are maintaining a safe space and providing a positive experience.
Do you offer discounts?
We do not offer discounts. We’ve priced our memberships to ensure we are providing outstanding value.
Do you offer team rates?
Please email [email protected] and let us know more about your team size and your goals.
What can I expect after joining?
The best time ever! An exciting onboarding email will be lovingly delivered to your inbox, and you will be able to log in to your community and be guided through the next steps. We will recommend some activities and actions to help you learn your way around and find the programming you’re most interested in. Definitely check out the calendar of events and join an upcoming live session so we can say hello!
But here’s the most important expectation: you have to put in the time to get the most out of a community experience. This is not a magic bullet but rather an opportunity to learn and grow with your peers.
Can I talk to Pat Flynn or Matt Gartland once I join?
Joining our communities will not grant you unlimited access to Pat and Matt. Our Pro members have the most access to them through our Expert in Residence program. Our full-time Community Managers will be your primary connections to the SPI team.
I have a product or service I want to share with your community. Can I do that?
We have a strict no-selling policy in all our communities and will remove anyone found soliciting customers per our Community Guidelines.
I want to create a community like yours. Can you help?
We recommend enrolling in our Community Business Blueprint course, exclusively available in the All-Access Pass membership.


Ready to find join your people and level up?
Like you, we’re online entrepreneurs who crave connection, direction, and support from people like us.