 Pat Flynn
Editor’s Note: Since this post was written, SPI has switched our email service provider from Aweber to Kit. The advice on this post, with the exception of the global call to action, apply to any email service provider. If you’d like to learn more about Kit, click this affiliate link. [Full disclosure: Pat Flynn is a compensated advisor and SPI is an affiliate for Kit, which means that we receive affiliate revenue when you purchase through our links.]
So you’ve signed up for an email service provider (ESP). Great! You’ve placed opt-in forms on your website and you’re building your email list. Sweet! You’re ahead of most.
And you’ve setup an auto-responder sequence and also send the occasional broadcast to your list, each with that perfectly crafted subject line to maximize your open rate. Awesome!
Unfortunately, if you’re like most people who do email marketing, you’re probably just scratching the surface with what’s possible.
It’s like that saying: We only use 10% of our brains. Although that’s a myth, the fact that you’re not getting the most out of your email marketing efforts is not.
Here’s our email marketing checklist of the top 10 customizations you can make to get the best return for your efforts.
What’s your score?
1. Opt-in forms on your most popular pages (Hint: Don’t guess. Use your analytics!)
We all have awesome posts in our archives that seem to disappear forever once they leave our homepage. That’s the sad part of blogging, especially when you’re just starting out and you publish all of your best content first…when no one is reading.
Sometimes, however, those old posts may end up attracting a ton of traffic to your site. Google may finally get their head on straight and an older post of yours shoots to the top of the results page for some highly searched keywords. Other times, an influential site may link to it.
Whether you know this is happening or not, chances are you’re not taking advantage of the increase in traffic to your archived posts.
Here’s your simple 2-step call to action:
- In your analytics account, find out which older posts are getting a lot of visitors.
- Insert opt-in forms on those posts. Don’t just rely on an opt-in form at the bottom of those articles.
Try it out, and you can thank me later.
2. A two-step opt-in process
Despite the popularity of SPI Podcast Session #78 with Clay Collins, co-founder of LeadPages—where he stated clearly that a two-step opt-in process out performs a normal 1-step opt-in process—not very many people are implementing it. [Full Disclosure: I’m a compensated advisor and affiliate for LeadPages.]
Ever since the redesign of the SPI blog, I’ve been building my list here on the site with a two-step opt-in process, and the numbers don’t lie. Even though I have less opt-in forms throughout the site (I don’t even have one above the fold on the homepage), my conversions into my email list have increased by over 25%.
If you are unfamiliar with a two-step opt-in process, it works like this:
Instead of showing an email and/or name field directly on your webpage, you instead show a button. When that button is pressed, a small pop-up box (or “lead box”) appears, which then asks for the visitor’s information. Like this:
You can even see it being used at the very bottom of this post.
This goes against most conventional Internet Marketing wisdom, which says the more steps involved, the lower your conversions will be. But there are 3 reasons why this particular sequence works so well:
- When a visitors lands on the page, you’re not directly and immediately asking for that person’s information. You go from looking like a “taking page”, to a “giving page”—one that gives off the notion that you have something to offer first, instead of wanting an email address first.
- When the button is clicked, that’s one action that your visitor has already taken. It’s like a virtual “yes ladder”, which is a scientifically-proven persuasion technique that helps one close. They’ve already said yes by clicking the button, and are likely to say yes again by filling out the form. If you just show the form right away, there’s a lot more to do before getting to that first yes in the ladder, and you’re less likely to close.
- When the pop-up appears, the visitor has only two actions they can take: fill out the form and submit, or click the (x) to leave. Since they are in “yes mode”and the distractions are gone, you’re likely to capture that email address.
To be fair, setting up a two-step opt-in process isn’t 100% easy right out of the box. The free method would be to setup a button that links to a separate page with the form on it, although a pop-up or lightbox effect will convert much higher.
That’s where LeadBoxes comes in handy. LeadBoxes is a specific feature in LeadPages that creates the two-step opt-in process for you. It’s actually a feature that I personally requested as an advisor of LeadPages. All price points of the LeadPages software have access to LeadBoxes. I’ve used it recently in the promotion of The Smart Podcast Player too. You don’t even need an image or button to call the pop-up—you could even just have it be a link. [Full Disclosure: I’m a compensated advisor and affiliate for LeadPages.]
100 Emails Challenge

Build your email list now with our three-day challenge
Three days, three emails, and one download, all packed with step-by-step instructions to walk you through the process of taking your email list from zero subscribers to 100+.
Free newsletter. Unsubscribe anytime.
3. A custom thank you/Please confirm page (after clicking subscribe)
Whether you use a two-step opt-in process or not, what happens immediately after someone fills out their email address and hits the submit button?
Typically, an email is sent to that person asking to confirm joining the list.
But what else? Where does that person go to from the page that they subscribed from?
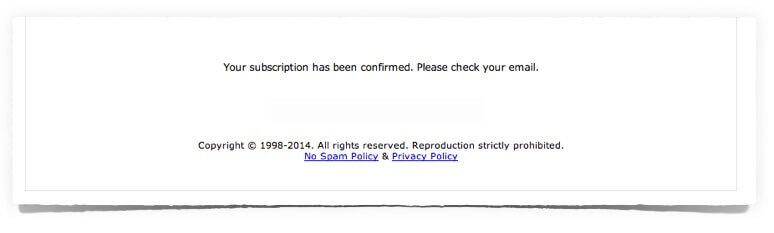
By default, it’s to a page similar to this one, depending on your ESP:
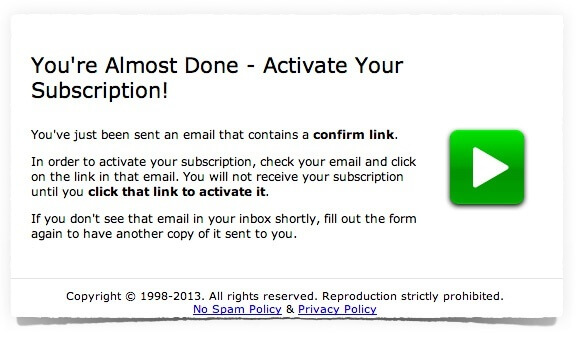
In other words, it’s a dead page—a place on the web where no further action can be taken, except “back” or “exit”.
Dead pages on your own site are bad, like 404 pages (which is why you should optimize them, like this) although people could hypothetically click around and navigate elsewhere on your site, if they are still interested.
But driving traffic to a dead page on another third-party site?!
Blasphemy.
That’s why setting up a custom thank you page is #3 on our email marketing checklist. In 5 minutes, you could easily setup a custom thank you page that people land on after submitting their info. On this page, you could include the following:
- Thanks!
- A note about having to click the confirmation link in the email that was just sent to them.
- A way to contact you if they don’t get the email.
- An image. Although not necessary, it’s a nice touch.
- Additional calls to action.
With #5, you have to realize that at this point, your prospect is hot. They’ve said yes in the yes ladder a few times already, so having additional calls to actions on this thank you page could do you very well.
You could:
- Include links to some of your more popular blog posts, to keep the conversation going.
- Share products that you sell on your site (and maybe include a special subscriber-only discount / coupon code too)
- Anything else that might be helpful to your audience.
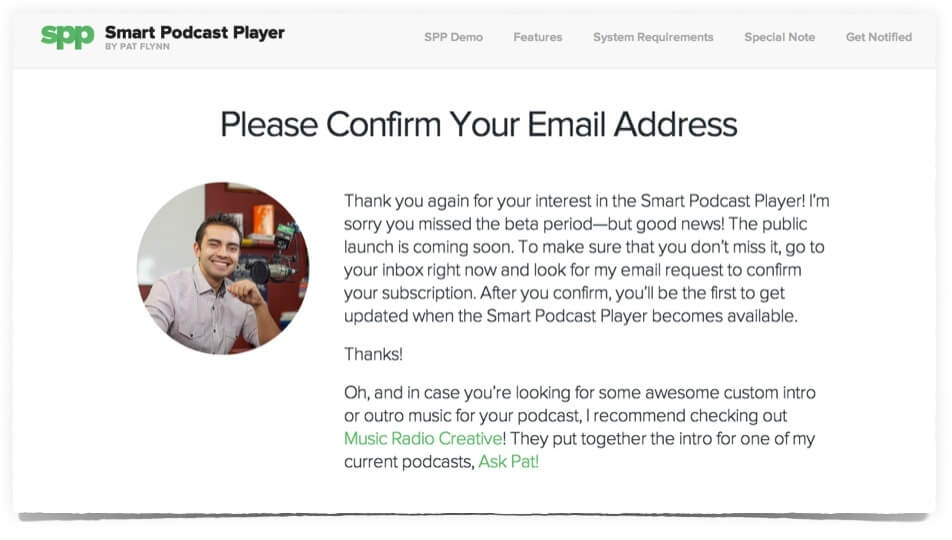
For a great example, check out the “please confirm your email address page” for The Smart Podcast Player:
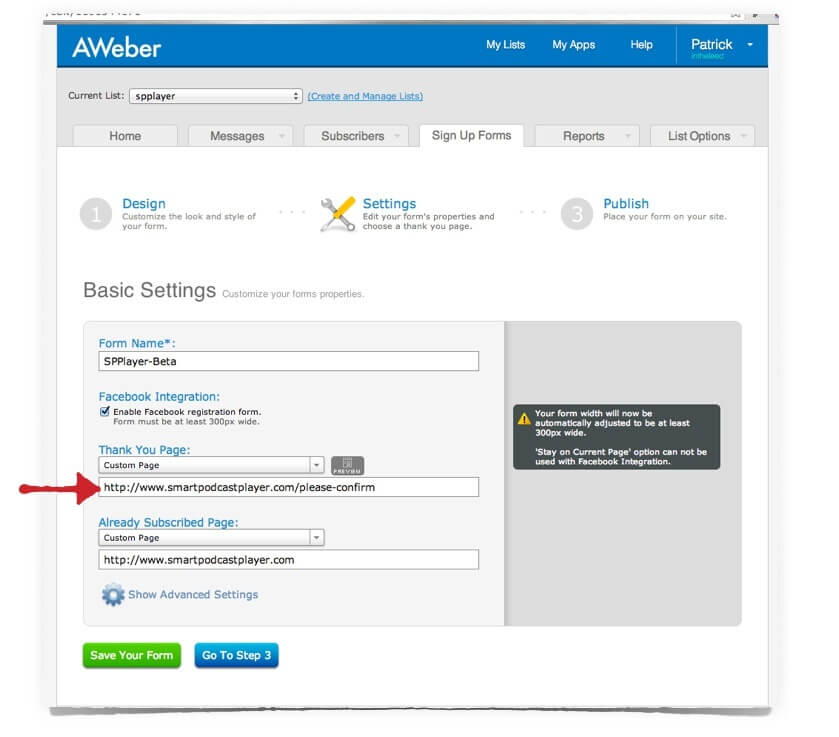
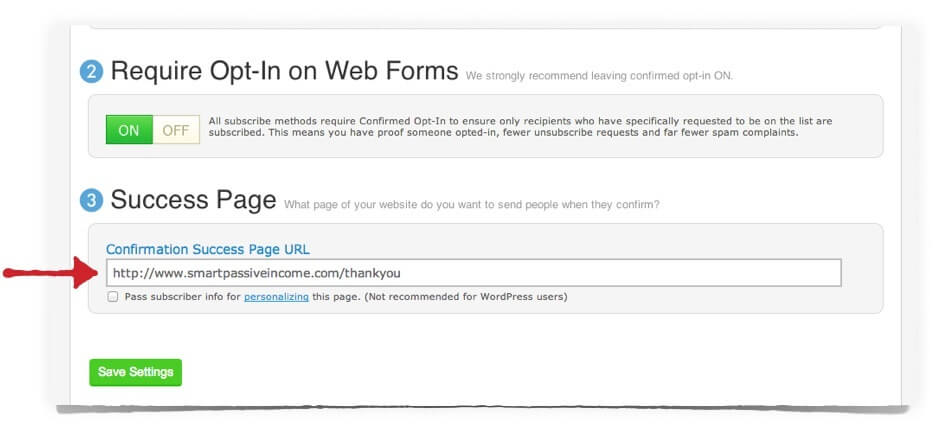
Where do you enter this custom URL in your ESP? If you’re in Aweber, [Full Disclosure: As an affiliate, I receive compensation if you purchase through this link.] like I am, you can input the custom thank you url in the specific web form that you create, as shown below:
Here are some other custom thank you page tutorials for other ESPs that I found:
4. A custom thank you/success page (after clicking link in email to confirm)
Like #3, you have another opportunity to keep your visitors engaged during the subscription process, this time (after even more yes’s) after they click the confirmation link in the email that was initially sent to them after submitting their into.
By default, when people click that link in the confirmation email, they’ll be redirected to a “success page” that looks like this:
Another. Dead. Page.
Another. Lost. Opportunity.
When you choose to redirect to a custom page that you create, here’s what it might look like. This is the custom thank you page people land on after confirming their subscription to get notified about the public release of The Smart Podcast Player:
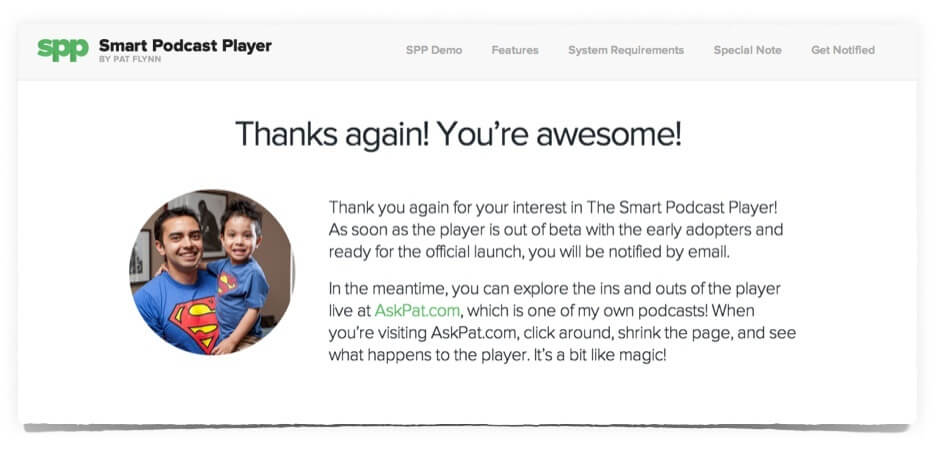
All of the same “additional” or upgraded information (per #3) could be shown here, although you may want to mix up (and test) various call to actions on this page. This is the end of the string of events people go through to subscribe to your list, so you’ll need something to keep them going, or else they’re out.
Yes, you have their email, but you also have their full attention at this point too.
Use it.
The field to enter the URL for this page is in the list settings area (again, in Aweber specifically):
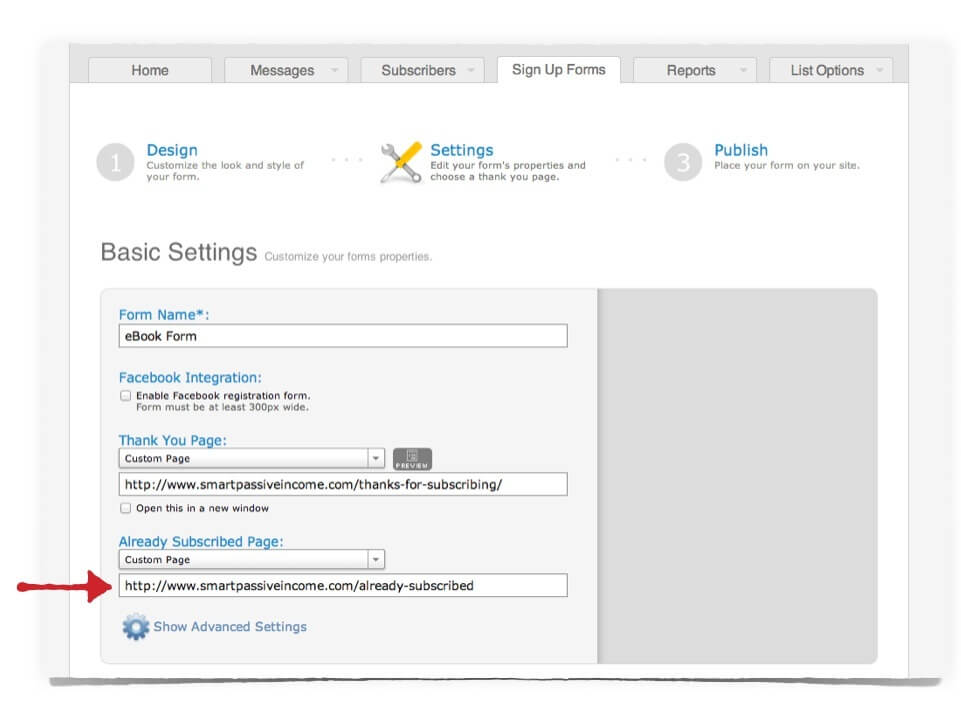
5. A custom “already subscribed” page
Sometimes, your subs forget that they’re already subscribed to your list, and they try to subscribe again.
When they do that, what happens?
By default, your ESP will send them to a page that looks like this:
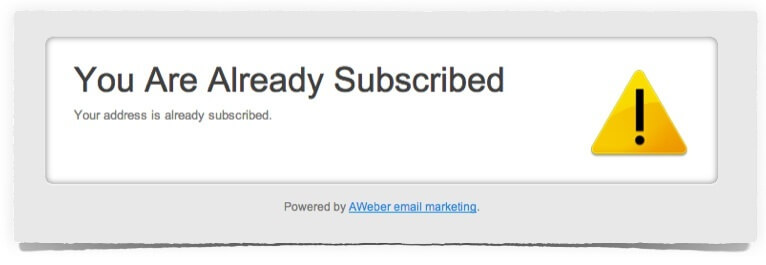
Imagine landing on that page. It doesn’t feel (or look) very good.
At the very least, you should create a custom page that says something simple like: “Sorry! You’ve already subscribed!”, which keeps them on your site.
Of course (and you know this by now) you should add additional resources to that page, much like we did in #3 and #4 from above.
If you incentivize subscribing with a lead magnet or giveaway when people subscribe to your list, make sure to add links to those giveaways on this page as well, since a lot of people may have lost it and attempt to re-subscribe just to get it again.
This is also a great solution if you plan on giving away multiple lead magnets on various pages on your site, but don’t want to create a new email list for each one.
The option for the “already subscribed page” in Aweber is specific to each web form. See below:
6. A killer first email
A new visitor lands on your website and likes what they see.
A few yes’s later and they’re now subscribed to your email list. Yay!
A minute later, that first followup email arrives.
It better be good.
No, actually—it better be the best.
The idea here is to blow the mind of your new subscriber, so that it would be ridiculous to unsubscribe now—or ever. Creating an amazing first experience means your subscriber will look forward to more from you. This, in turn, increases the open rates of future auto-responder and broadcast emails, and the trust they have with you and your brand.
If possible, share a quick actionable tip—one that doesn’t take much time but can produce an immediate result.
According to Charles Duhig, author of The Power of Habit, small quick wins are amazing because they start a habit of reward in people’s minds, and if you’re the one providing that quick reward, those people will have a habit of coming back to you for more. [Full Disclosure: As an affiliate, I receive compensation if you purchase through this link.]
First email = Small quick win.
The smaller and quicker, the better. Show that you have value to add.
If you’re subscribed to my email list, you may even remember the first email that I sent out and the quick tip and win that I share 🙂
Although there are more factors involved, this is part of the reason why I believe I have open rates in the 35-50% range, even in my auto-responder series.
7. Scannable content and isolated links
According to my buddy Greg Hickman of Mobile Mixed, 65% of emails are being read from a mobile device.
65%!
If you’re not writing your email content in a way that’s easily consumed on a mobile device, you might as well cut all of your numbers in half.
You don’t have to go crazy with adjustments, but just keep these quick tips in mind:
- Send yourself a test email, and then view it on a mobile device to see how it reads.
- If you’re sending longer emails, things like bold, italics and (especially) sub-headers go a long way. Keep the content as scannable as possible. It’ll make it easier on the eyes, and people are more likely to get to the bottom (i.e. where the call to action should be).
- Any tappable links should be located on their own line with space above and below. This is to prevent “fat-fingering” or mis-tapping (something I do all of the time, because I really do have incredibly fat thumbs). You want the links to be “can’t miss”.
Here’s a link to an article on Venture Beat with more information about these statistics, which are indeed favorable for marketers.
8. Remind people WHEN and WHY they subscribed
At one point early in my online business career, I subscribed to over 20 different email lists from various online marketing gurus. I did this to learn from the best and educate myself on email marketing strategies, but for the most part I simply learned what not to do.
The biggest lesson was that I always felt like a number, or a potential credit card while on those particular lists, which I didn’t like. This is why I personally take the no-direct sell approach with my list, and I remind myself that there are actual human beings on the other end of the computer screen.
One thing I did take away and emulate from a number of those lists was a simple reminder within each email about when and why I subscribed.. Something like that can deter an unsubscribe because it’s a quick way to reintroduce the value that the list could provide a subscriber.
I include the following at the end of each of my emails, although some people like to include something like this at the very beginning. It’s up to you:
————
This email is being sent to you because you subscribed to Pat Flynn’s Smart Passive Income Newsletter at smartpassiveincome.com.
Here is your subscription information:
Name: {!name}
Email: {!email}
Subscribed on: {!signdate long}
If for any reason you do not want to receive any more valuable tips, resources and insider information about blogging, product creation and online marketing, you can unsubscribe by clicking the link at the end of this email. No hard feelings!
Cheers!
{!global calltoaction}
————
Why do I even bother asking people to unsubscribe?
Two reasons:
- By putting it out there, I’m not hiding anything. It’s a reminder of the transparency and authenticity of the brand that I hope people stay subscribed for.
- If people read that passage and they feel like unsubscribing, I hope they do. I only want people on my list who really want the content I have to share.
Note that the syntax shown above is specifically for Aweber. The name syntax automatically replaces that text with the name of the subscriber, the email one is self-explanatory, and the signdate long syntax is replaced with the date that the person subscribed to the list.
If you use another ESP, I’m sure their help desk will show you how to do something similar.
9. Apply a global text snippet
In the above pasted example, you may have noticed the syntax at the bottom that reads:
{!global calltoaction}
This is another feature from Aweber—one that I truly love. Last time I checked, even InfusionSoft doesn’t have this feature, which boggles my mind.
I wrote a full tutorial on how to setup and use the Global Text Snippet feature here, but this is essentially how it works:
I include the syntax {!global calltoaction} at the bottom of each of my auto-responder emails. Remember, these get sent out sequentially over time after a person subscribes. I have nearly 40 pre-written emails that go out over the course of an entire year, and so within any given week, there could be upwards of 40,000 of these emails (estimated) being sent, automatically.
Within my Aweber list settings, I can enter a Global Text Snippet that will replace every instance of that syntax when it’s sent out.
So for example, let’s say I have a Google Hangout planned for next week, and I want to maximize viewership. In one spot in Aweber, I can change the global snippet to say:
Join me on a FREE Live Google Hangout, May 15th—Click here:…
This message will then be placed at the bottom of each of my emails, or where ever I have that syntax placed.
The next week, I can change it to something else important.
Totally ninja.
Again, you can read the full setup tutorial here.
10. Welcome and encourage replies
We get selfish with our email lists. Not just because we don’t want to share it with others (which is totally understandable), but because we are always having a one-sided conversation.
We tell, we share and we promote, but we don’t ask, we don’t wonder, and we don’t encourage a reply.
In several of the emails that I send, I actually ask my subscribers for a reply. I ask things like:
- What are you struggling with?
- What would you like to see me write a blog post about?
- What was your first impression when you visited my website?
- Please tell me, how can I improve to better help you?
- What’s one thing that bothers you about your online business or blog?
The answers I get are worth so much, because they give me deep insight into some of the most important people who are a part of the brand—my subscribers. These are people that could comment, read, share, listen and potentially become customers down the road.
And because many of these questions are asked in an auto-responder series, I’m constantly getting emails that truly affect the actions I take, the content I produce and the overall direction of the brand.
Totally auto-pilot.
I see too many marketers out there who dread getting emails back from their subscribers.
Dehumanizing them, in a way.
It becomes incredibly apparent when the email address is no-reply@, or when the email reads “please do not reply to this email, no one will answer you.”
How’s that for building a relationship?
Talk about a huge, wasted opportunity there.
What’s your score?
If you haven’t yet started your email list, that’s okay. Better late than never.
You can check out my free tutorial here to help get you get setup with an email list.
If you have an email list, how did you score?
Out of the 10 email marketing strategies, how many are you actually doing right now?
- Opt-in forms on your most popular posts.
- A two-step opt-in process.
- A custom thank you / please confirm page.
- A custom thank you / after confirmation page.
- A custom “already subscribed” page.
- A killer first email.
- Scannable content and isolated links.
- Remind people when and why they subscribed.
- Apply a global text snippet.
- Welcome and encourage replies.
Leave your score in the comment section below.
Me: 8 out of 10.
It might be weird to see the author of this post not get a 10 out of 10, but I’m just being honest with you and showing you that there is always more room for improvement, no matter what level you’re at.
Now I know what I need to work on, and I hope you do too.
Thanks again for your support, and if you enjoyed this article, please help me out by sharing it for me.
Cheers!
 Luke Guy
 Mindy Holahan Peters